Monday, August 23, 2021

Circles Have No End ... To Ideas


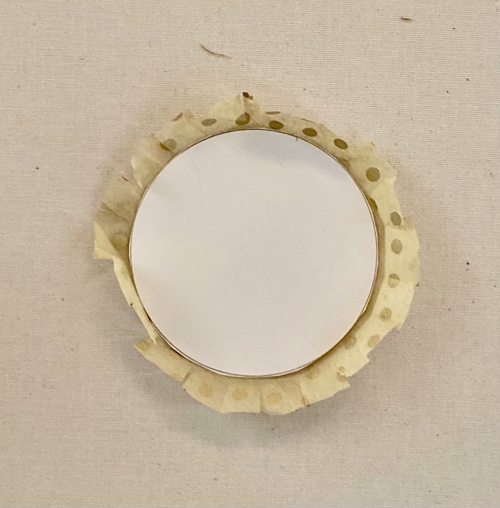
The theme for this months blog is “Four Seasons Crafting with Chapter 3 Dies”, I chose to use the Ornament Box die. Sunflowers seem to be perfect for Summer and Autumn decorations. Using the simple circle shape set my mind searching for ideas. What different ways can this shape be used? Can any of the other shape designs on the die be used? Combining three of the shapes included on this die brought a out the sunflower garland. ***An added bonus of two other ideas are also included using the circle cut in simple ways. 

TIPS & NOTES: 

(Please read these tips and notes before beginning the project.)

Before listing the steps to make the sunflower garland here are some tips on materials and process that I used.  The garland can be made with any amount of flowers needed for a short expanse to a larger one.  The projects colors lend itself to the summertime and autumnal seasons but using a different color pallete with the same instructions can make lovely decorations for any season.  

Being a lover of paper, of course papers can be used to make these flowers, but it’s always fun to experiment with other materials to combine for texture and uniqueness. After paper my “go to” is always fabrics! 

Crepe paper is used for some of the petals but petals can also be cut from coffee filters that are colored by dying them with inks or diluted paints. The coffee filters are stronger then tissue paper. Make sure the grain of the crepe paper is running vertically on the elongated oval die shape before cutting out the pieces needed. 

The zig-zag design on the die is used for added embellishment around the centers of the flowers. A light weight cotton print was backed with a light weight cotton fusible fabric to help keep the shape to these pieces. (This is optional but wanted to use/show as many shapes from this die as possible.) A ready made rick-rack or other trim could also be used as an extra embellishment. 

The leaves were cut from two shades of green felt using a shape from a nested set of thinlit dies by Sizzix (likely retired now), use another leaf die or make a paper pattern, trace and cut your own leaf design. 

These steps can be altered as needed or desired for your own look or interpretation.


Materials

Eileen Hull Ornament Box die

Leaf dies

Sizzzix Big Shot 

Fabrics 

Felt

Fusible adhesive

Crepe paper, yellow/gold 

Coffee filter, colored with ink or paint (optional)

Metallic mesh ribbon (optional)

Ribbon 

Corrugated board

Double sided adhesive

White craft glue

Ribbon or cording 

Iron

Pressing board


Instructions:

  • After choosing fabric for the circle centers of the flowers, adhere a fusible interfacing between two layers of the fabric. 


  • Cut the circle shape from the layered fabric for each of the flowers needed.  
  • Cut circles from a mesh ribbon for each flower.


  • Glue the mesh circles over the fabric circles, by applying glue around the outer edge.
  • From the crepe paper, using the narrow oval shape on the die, cut 18 pieces for the petals of each flower. (If using an additional type of material for the petals cut half the amount (9) from each). 


  • Fold each of the petals in half. 
  • Slightly crease the folded edge and glue the fold in place.  
  • When glue dries, shape the petals by slightly pulling out from the center. 


  • Glue the 18 folded petal shapes around the edge of the fabric circles.
  • Space evenly around to fill and slightly overlapping if necessary. 
  • Cut leaves from green felt, two large, one small. 
  • Cut a circle from corrugated to back each flower.  
  • Apply a double-sided adhesive to a green fabric and cut circles to match the amount of flowers made.  
  • Apply the adhesive backed circles to one side of the corrugated circles.  
  • Glue leave in place on the back of each flower (refer to photo for placement).   
  • Lay a length of ribbon along the top of each flower and attach with glue to hold in place. (Space the flowers apart as evenly as possible.) 
  • Glue the green fabric covered circles to the back of each flower.  
  • Cut 3 zig-zag shapes for each flower. These are glued around the center of the flowers for added embellishment. (Refer to photo below) Overlap the end of each zig-zag shape slightly. Adjust the curve of these pieces to the circle shape. 

Close-up of petal, trim, leaves


Half Moon Felt Garland

Cut circles from felt.  Fold each in half and press in the fold. On a length of thin cord, glue the half moon shapes along the cord.  Leave a small space between each.  Loop a strip of torn fabric between each. It these to the length desired. Embellish the felt pieces with embellishments if desired or leave plain. Refer to photo for placement of components.


Tiny Notes

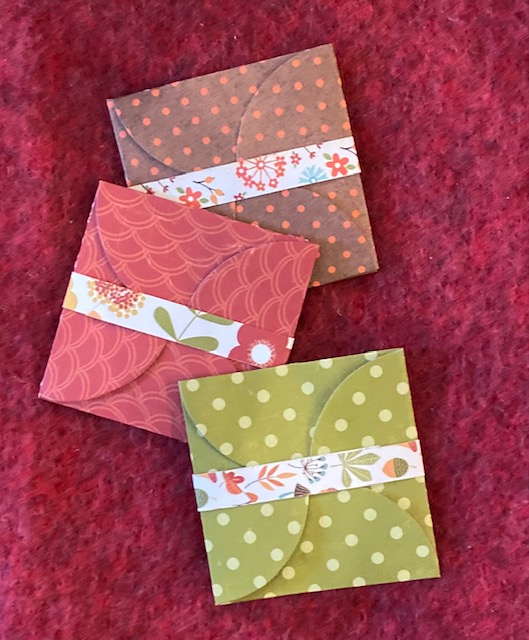
Cut four circles from decorative, double sided papers. Fold each circle in half. Place the four together as shown.  Hold in place with some small clear pieces of tape on the inside.  Apply a 3” square of solid paper onto the inside center, along the folds. Make a band from a strip of the paper to wrap around the tiny note card. Tuck one in anywhere with a special message! How nice to find a little note in a lunch bag or box, a backpack pocket, a coat pocket and more.



Sunday, July 25, 2021

Christmas In July Ornament Idea


With this latest release of die by Eileen Hull for Sizzix comes great shapes. For now the Ornament Box will be the one to work with for this project.

Materials

Big Shot

Eileen Hull Sizzix Ornament box die

Mat board

Decorative papers

Foil paper (Rinea papers) 

Double sided adhesive tape/sheet

Tissue paper/napkin

Foiling sheet, gold

Liquid adhesive for foiling

Gel medium

Brush

Ribbon 

Glue

Paper cutter

Gold cording

Artificial greens

TIPS

**** Just a few ideas tips of materials and the process used in creating a slightly different version with the Ornament Die***  

A decorative tissue paper was used to cover the circle die-cuts, but napkins or thin decorative papers or even fabric could also be used. Also if desired, cover the mat board with a material of choice on one side and add a foil paper or use the same type of material on both before continuing to cut them with the die.  Foil by Renea were used in this project. 

Refer to photos for cuts and sizes that were used to complete this project.  A small piece of styrofoam was cut to fit inside the inner box to hold the artificial greens in place, but that is optional. The same design could be used to hold small treats instead.  They can be hung on a Christmas tree or could be used at table settings for holiday entertaining.  The bottom of the circles could also be trimmed off to be even with the bottom of the box to stand flat for table settings. 

Paper covered inside box & front and back of covered circles


Constructing the Ornament Box

  • Die cut two circles from mat board
  • Die cut two circles from foil paper (red Rinea foil). It can be backed with double sided adhesive before die cutting or can be glued into place on the back side of the tissue covered circles.
  • Die cut one of the box component from mat board.
  • Refer to the photo that shows where to trim the four diagonal ends off the piece. 

  • Cut two side pieces from a piece of mat board that measures approximately 1 1/8” wide x 1 7/8” high.


  • Using glue or double sided adhesive tape, assemble the open box shape.
  • Cut decorative paper to cover the box shape. One piece is cut approximately 6 3/8” long x 2 3/4” (this will cover the larger sides of the box).  It a second piece of paper approximately 1” x 8 1/2”. (This will be attached to the narrow sides, bottom and over the top edges of the box piece.) 


  • Cut circles from decorative tissue or napkin for covering the mat board circles. Cut the pieces approximately 1/4” larger then the circle piece.


  • Apply the tissue to one side of the circles using gel medium and brush. Clip around the tissue so the extra tissue can bend around the edge to the back side; use the gel medium to adhere the extra tissue in place. Brush the front layer of tissue with another coat of gel medium and let dry before continuing.

  • Adhere the foil circle to the back side covering over the tissue edges; press in place well.
  •  When both circles are covered and the inner box shape is covered, created the 3 dimensional ornament by gluing the box between the circle shapes.
  • Coat the hanger shape die with foiling adhesive. Dry to tacky and rub on the gold foiling. Add another layer if needed also applying to edges and back sides. Glue into place at the top of each circle shape. 
  • Die cut 2 or more of the zigzag design from foil covered mat board
  • Apply the zigzag shaped, foil covered pieces onto the circles in any desired fashion. 
  • Insert a small spray of artificial greens into the box 
  • Add a length of cording through the hanger and knot.
  • Tie a length of ribbon into a bow and add on front near the top, near hanger.

Decorate away!


Wednesday, June 30, 2021

New Dies Coming Our Way - New Ideas Coming Too

It’s party time again, Release Party that is!!! It’s time to unwrap some new dies and new inspirational ideas. I chose to use the dies to create projects for the Christmas holiday.


The new truck die was given a few additions to the body. It was given a little shiny finish made with some embossing powder. Headlights were added, along with a door, a license plate and "trees for sale" sign complete the pickup truck. 


The ornament box die was given a slight change to create a box, to insert some holiday greens.  Whatever way this die is configured it can be hung on a tree or used as a place setting on the holiday table in various ways.


The last of the new dies are thinlits that can be used in many ways.  Here they are used to simply decorate cards.


**** Details for making all the projects will be shared in other upcoming posts.


Blog Hop Participants:

Monday, June 21, 2021

Summer Travel - What To Take Along


Summer travels are happening again this year! Many have already taken to the road or other means of traveling to various destinations. 

A few years back I created two journals from Eileen Hull's Journal die for two of my grandchildren to take on a road trip with their parents to points west of where they live. It was meant to be a way for them to right down thoughts of places they would be going to; but also as a keepsake to place anything interesting that they found.  Here is a photo of the journals made for them. 

The journal die was also used to create something similar for two friends that where traveling to Scotland several years ago for the same purpose. Unfortunately I deleted the photos I had of them but they were easy for them to tuck in a backpack or travel bag for taking and keeping notes or information of the  places they were visiting.

For this latest journal I used many of the same ideas, but with the addition of some of the newer dies from Eileen, I made some additions.

Materials

Eileen Hull Journal die

Eileen Hull Notebook die

Eileen Hull Folio Journal die

Folio  page, pocket and flower dies

Eileen Hull Homemade Alphabet die

Sizzix Label die

Big Shot machine

Matboard

Adhesive, of choice

Old map

Card stock

Clear vinyl adhesive sheet

Elastic

Inserts for writing

Chalk tape

NOTE: To make this journal, covered completely outside and inside with an old map, I used Thermoweb Heat n Bond Ultra, iron on adhesive.  Of course double-sided adhesive sheets can be used or a spray adhesive also. Anyone not familiar with using Heat n Bond as an adhesive in crafting projects, it takes a little practice to getting the heat setting on the iron and the pressure needed to adhere different materials together. I also used another product from Thermoweb after the map was adhered to the pieces of matboard called Thermoweb vinyl. This material was applied to the covers, outside and inside and the separate inside box that was created also. After applying, the excess was trimmed carefully with an Xacto knife. Hint: A clear covering product like contact paper can also be used.


  • The inside pocket box is made from cutting the Notebook die and three of the end pieces from the Folio Journal die.
  • To form the box, one of the end pieces is attached to the bottom of the box with double-sided adhesive tape.
  • The two side pieces are trimmed slightly at the top to be even with the box and attached to each side with double-sided adhesive tape. 
  • Elastic was threaded through the opening along the edge of the box that will be closest to the journal spine; threaded through the bottom, middle hole and center hole, then knotted.
  • The signature inserts were purchased and inserted with elastic to each side of the box insert. 
  • Corner pockets are cut from card stock, covered with the iron-on vinyl (if desired) and attached to the corners with double-sided adhesive tape.
  • Letters and labels are cut from black adhesive backed chalkboard tape.
  • Add your choice of closure ... pack up and hit the road for an adventure!


Tuesday, May 25, 2021

Creating With The Unusual


Thinking outside the box can be challenging but it helps to stretch ones imagination. There’s bound to be failures but many times it opens up creative possibilities.  Visits to any variety of shopping establishments for the the “usual” purchases can take on something entirely different with an open mind and willingness to experiment.

Besides always first searching through the items I have collected and are on hand, one of the other places I find a good spot to visit are the area “dollar” stores.  That’s exactly where I found o few items to experiment with for this very project. From a package of two manila , padded mailing envelopes comes the end project of this unconventional, padded folio.  

  • Open up the mailing envelope by cutting it open along the sides and bottom. 
  • From the two pieces cut two covers from the die. NOTE: I did not use wide (3 hole) spine. I trimmed it to 2. Also cut a spine from mat board and trimmed to a 2 hole spine to add strength. Though the spine was not used in this project for individual inserts, adding this extra piece as a re-enforcement will help if an additional inserts is desired.
  • Before reconstructing the die-cuts into a new padded folder it's best t0 remove a little of the plastic bubble lining from around the edges. This will help hold the edges together with adhesive tape or glue.

A new padded folio journal was created from the two pieces. 

The procedure is as follows:

  • Using the instructions from the tutorial by Jennie Atkinson, I made four folded folio inserts to fit the front and back covers and two more inserted to the insides. I created a large one for the back cover, a tiny one for the front following the size specifications from Jennie.The inside two are slightly smaller then large one. A big "THANKS" to Jennie for the instructions and inspiration!
  • Here is a link to Jennie's YouTube video showing the process - VIDEO LINK
  • For the small version, the measurements are:  6 x 6 patterned card stock scored at 1.75” all around and then cut as per the original tag book. Final size is 2.5” square.
  • The two inside folder folios begin with paper cut to 9 3/4" square, scored at 2 3/4" on all four sides. One folder was cut in the same way as the original instruction. One was cut with the corner square cut diagonally and folded over. (Refer to photo)
  • Inserts were made with the bookbinding die three of the folders, for placement in the center of them.  
  • Use the new thinlit die to create a waterfall insert in the fourth folder.  

Front cover small folder folio/open


Back cover large folder folio/closed

           
Back cover large folder folio/open

                   
Inside Right folder folio/closed


Open folder folio


Inside Left folder folio


Open folder folio


Materials

Eileen Hull Sizzix die, Folio Journal

Eileen Hull Sizzix thinlit, Bookbinding & Label

Eileen Hull Sizzix thinlit, card, Waterfall & Tags

Big Shot

Padded mailing envelope

Adhesive tape

Glue

Decorative papers (I selected papers from Simple Stories, Simple Vintage Farmhouse Garden collection)

Assorted embellishments from the same collection

Various other decorative papers 

Various others embellishments

Woven edge seam binding

Distress ink and applicator

Decorative edge scissors, pinking

Velcro, thin clear fasteners, 5/8”, 3/8”


Tuesday, April 27, 2021

Folio Fun


Ideas using this new Folio die designed by Eileen Hull for Sizzix gives us loads of possibilities to create with. The idea I will be sharing here is a “white on white” album using a canvas type of material. It is embellished with cuts from a thinlit set of dies using the same material and layered to create the patterned motif on the front and back covers. 

I cut the folio covers from a product called Kreative Kanvas  (which is unfortunately no longer available) but is VERY similar to a product called Kraft Tex. This material can be cut, sewn, glued and colored. Since it does not have the thickness of mat board it will leave a faint score line at the necessary places.  NOTE: If Kraft Tex is unavailable, a thick artist canvas could likely be substituted.

Cut 2 pieces for the folio front and back covers. Cut design elements for layering using desired thinlit dies and the same material.

Back cover design 


***Refer to the photos that show the folding and stitching to create the album. NOTE: I stitched around the covers on 3 sides, leaving the top open to insert tags or other elements. It can also be completely stitched closed around all 4 sides. ***If no sewing machine is available, a fabric glue would work in place of stitching. It would be suggested to glue and clamp with binder clips till glue dries well.  


TIP: A closure for the album is made with a strip of the the canvas-like material, cut approximately 1” x 7 or 8” long. It was sewn to the back, inside cover before sewing the folded inside back flap together. Glue one or two clear Velcro 5/8” circles or a strip to the end of the closure strip and inside the front cover.  

Finished inside back cover with pen holder and closure

Placement for closure strip

Visual guide for inside back cover

To make a pen holder - Cut two of the extra pieces, from the same material. Fold over the edges on both and glue them together. Glue to the inside of the back cover and add a pen.

To form the binding - 

Line up the holes of the binding with the front cover over the back, matching the holes and grooves. The binding can either be glued together or sewn. Follow the lines between the holes if stitching (2 lines) and finish with another stitched line about 1/8” or 1/16” from the edge closest to the back cover.  

Lay the decorative designs in any desired pattern. Glue the elements in place on the covers . Set aside till glue dries. 

Once the album is together I gave it a coat of a shimmery gesso. NOTE: Any clear finish of choice can used. Try a glitter brush from Scrapbook.com, Link

Lace elastic either through the holes or over the grooves to hold 3 album inserts inside the album. 

Finish with a organza bow tied around the binding or any other decorative finish. 

Make inserts for the inside using any choice of decorative papers for covers for the inside signatures and copy paper for for journaling. 


Materials

Eileen Hull Folio die by Sizzix

Folk Art Elements Set of thinlits by Sizzix

Kraft Tex, white

Sewing machine/white thread

Glue

Shimmery Gesso

Brush

Elastic, white

Ribbon

Velcro circles, 5/8" clear

Pen

Decorative papers 

Copy paper


Sharing two more ideas with the Folio die, each from different materials. 

Made from the plastic packaging from the die and decorated with Washi Tape
 

Made from a plastic folder from the Dollar Store


Tuesday, April 6, 2021

New Dies, More Ideas with Folio Die

 A new release of Eileen Hull dies for Sizzix is here once again. This latest project here is made by combining the two new dies that were designed to coordinate with the FOLIO die and the other thinlit sets. 


The combination of all the dies gave me the opportunity to create a sweet little booklet to give as a gift. 

It began with a collection of coordinating decorative patterned  papers and card stock.  Die-cutting and layering the pieces and altering the folio as the base can create some fun projects. With this collection, the versatility and the ease of using these dies can result in so many interesting combinations. The Folio covers are cut without the fold and extra flap. All but one binding strip was removed for the spine to make the booklet. A single folder/page was constructed for placing in the middle of the booklet. The inside page contains the waterfall cuts.. The outside, front and back folder covers has the corner pocket attached to hold tags. The inside covers (front & back) of the main booklet have the binding die with tags attached. The booklet is finished off front and back with the Mandala die. The front shows a white shiny mandala adorned with flowers and leaves. The back cover has a black foil mandala cut and adhered with a button at the center for part of the closure. 

This blog hop will show ideas of all types to help with inspiration to start creating. This post will not be sharing a step by step tutorial of the process I used, but will be at another time.  Use this link from Eileen Hull Designs to see the post and read about the projects or use the individual links to each participant of the blog view each individual post here. 


Additional Photos of Folio Booklet


Material List

Dies: Folio journal, scoreboard die

         Mandala, thinlit die

         Folio Page, Pocket & Flowers, thinlit dies

         Card, Waterfall & Tags, thnlit dies 

         Bookbinding & Label, thinlit dies

Decorative patterned paper, several coordinating sheets

Card stock, coordinating solid colors

Double sided adhesive tape, various widths 

Spray adhesive or adhesive sheets

Ribbon, to cover spine

Seam binding

Cording, thin black leather

Elastic hair band

Button, flat for closure

Gel medium, matte 

Brush 

Embellishments 


IDEAS

Mother's Day is soon approaching and this little booklet would make a special small, personal gift card or keepsake for any mother, a new mother and grandmother.  Add photos, quotes, memories, gift cards onto or into pockets, the various tags or folded binding.  (NOTE: I have made my own folded accordian style binding for projects, and I'm really liking this new design.)

Think beyond Mother's Day to upcoming graduations, weddings, special birthdays or celebrations. This is basically a four page booklet made from coordinating decorative papers and some basic card stock. It can go from simple to extravagant as anyone likes. Any combination of the Folio Die with the other elements are a great start to very personalized projects.


***A MESSAGE FROM EILEEN***

Welcome to our Chapter 2 Release Party! Today we are sharing Folio Journal accessory dies- the Waterfall & Tags and Book Binding dies and the new Bigz L Camper ScoreBoards die! Use these elements in different size journals, cards and layouts!

Check out all the different ways to use these dies on our Blog Hop. Click through and leave a comment on each of the designers' posts and be eligible to win a $25 gift certificate in Eileen's Etsy Shop! 

Join us on Facebook Live and YouTube Live for an up close and personal look at the team's projects. I will also demo how to use the dies during the show. Really hope you can join us for this fun event- prepare to be surprised! Thanks for joining us!


NOTE: There is also another Eileen Hull die design in this latest collection being released.  It is a 3D Camper on a Scoreboard die to allow the use of heavier materials.  A new project coming soon using this die in a special way. 

Here are images of the three newly released dies from Eileen Hull -


List of Blog Hop Participants