Most dies are made to be used with paper only but I have a thing with always stretching my ideas to see just where I can take them. For some reason most projects that I make it's difficult to not mix things up. Sometimes that means spending time experimenting first with the wide variety of materials that are available. This project features one of the the new Eileen Hull chapter 3 dies used in a different direction, follow along with the steps given, for something new to give away or add to your holiday or seasonal decor.
Materials
Eileen Hull Sizzix die, Snowman
Snowflake die
Alphabet die
White felt
Thermoweb Ultra fusible iron-on adhesive
Foam adhesive sheet
Fabric scrap
Black heavyweight paper
Brown heavyweight paper
Orange card stock
White decorative paper
Metallic foil
Cording or ribbon
Ultra bond adhesive
Thin raffia
Red bead or tiny Pom-Pom
White pen
NOTES & TIPS:
White felt is layered together to make the snowman bodies. Decorative fabric is also layered together for the scarves. Instructions will be given on the process of using a fusible adhesive with both types of fabrics. *** Follow the instructions that come with the fusible adhesive for heat settings and process. Tips will be given here to help with the process. Most iron-on fusible come with a paper backing on one side.
Preparing felt and fabric before die-cutting shapes
The dies used for the snowflakes and letters are older dies that are no longer available but there are some newer designs available. Substitute another element for the snowflake and another style of alphabet.
Fabric Prep
- Cut 2 pieces of felt large enough for the nine snowmen shapes and a piece of fusible adhesive to match.
- Press the felt if needed before layering.
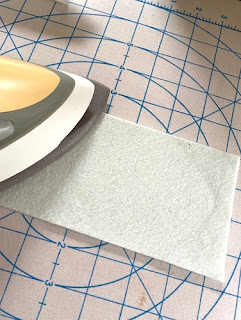
- Place the fusible down onto one piece of the felt with the paper backing facing up. Place iron onto the paper side of fusible. The best method is to press the iron down and hold for several seconds before moving the iron to another area. Once the entire piece is pressed down in this fashion, the iron can be slide back and forth over the fusible. Allow it to cool down. Remove the paper backing from the fusible. TIP: If fusible was not heat set enough it may remain attached to the paper backing. Repeat that area again; cool and release.
- Place the second felt piece over the fused adhesive. Press as before till both pieces are fused together. NOTE: Depending on the thickness of material used it may take a little longer to adhere the layers. Once shapes are die-cut and any edges are not completely fused, repress those edges carefully.
- The same process can be used for fusing thinner fabrics together (snowmen scarves).
Assembling snowmen for the banner
- Die-cut ALL pieces from desired materials.
- Lay out all the pieces needed for each snowman before gluing into place.
- Decorate black hats by gluing a strip of raffia around the hat (Refer to photo for placement). Allow glue to dry then add a piece of punched sprig and a red bead to finish the hats.
- Add all pieces by gluing onto the snowman shapes. Start by placing the hats on first in whatever fashion desired. Next add the scarves. Add the eyes and nose, finish with the two branch arms. Set the snowmen aside till all pieces dry.
- Cut a piece of a foam adhesive sheet for die cutting the letters used to spell out - let it snow. Remove one of the backing sheets from the foam. Place a foil sheet over the foam adhesive and press onto the adhesive we’ll. Remove the clear foil sheet cover. Die-cut the letters from the foam without removing the other release paper.
- Prepare another piece of foam adhesive sheet with for the snowflake spacers using the white decorative paper. Die-cut 4 snowflakes from the covered foam and 4 from paper only.
- Place the foil/foam letters onto the snowman near the bottom (Refer to photo).
- With white pen, add a small dot to each eye.
Stringing Banner
- Lay the snowman out in-line, facing up to arrange. Note: Notice that they are each close enough to have it appear they are holding hands. The snowflakes act as spacers between each group of snowmen and those next to them appear to be touching the snowflakes.
- Carefully turn them over, keeping them spaced.
- Run a bead of glue along the neck area to hold the cord. (Refer to photo). Note: If desired a small paper punched circle or square could be glued over the area where the cord runs along the back of each snowman for extra hold.
- Remove the paper backing from the snowflakes and line them up at each end and between the groups as shown in the photo. Align the other paper snowflakes over the snowflakes with adhesive.
NOTE: If you are in need of further instruction or clarification, feel free to ask. If you follow me on Facebook or are a member of Eileen Hull's Fan Club, you can ask a question there. Until I can resolve a problem replying on by blog, I may not be able to quickly answer any concerns.


such a cute snowman garland Madeline! =)
ReplyDeleteThis Snowman banner is just adorable Madeline! I love how you are always exploring new materials and techniques!
ReplyDeleteOh what a sweet snowman wall hanging Madeline! love the pretty scarves and decorations on their hats!
ReplyDeleteJust darling! Love the sprig on the hats!
ReplyDelete