Tuesday, March 29, 2022

Large Journal - Book Box Mash Up


When your mind seems to always be thinking of ... hmm, what can I do to make this just a bit different!  What I love about Eileen's dies are the way they can be really versatile with a little rethinking.  The scoreboard dies especially lend themselves to many ideas because they can cut so many different types of materials. 

To make this stationary box, I combined the large full size journal with the components of the book box. It wasn't enough to just make it from mat board, it seems an idea struck to give it a "faux" wood look, but maybe see if a form of "real" wood could be used.  Then inspiration struck again ... why not combine a small amount of woodburning onto the wood veneer. 

****My inspiration for this box came from a project I created many years ago that I will share at the end of this post.****


Inside box finished with decorative paper and a fabric bottom.

  • The process for combining each of the dies to create this type of box is not difficult but takes a little manipulation to  create two longer sides with the original box pieces. 
  • By using the black mat board to construct the large journal and side strips for the box make a good foundation to work from. 
  • Cut the full size large journal from black mat board, the front and back covers.
  • Cut two of the longer sides pieces from the book box die (the piece that measures 6 1/4" long) from black mat board.
  • Cut four of the shorter side pieces (the piece that measures 5" long) from black mat board.
  • Two of the short side pieces will need to be connected to each other to form one long side of the box portion. 
  • The same process will need to be repeated for the other longer side before connecting them to the other side pieces.  NOTE: These two connected sides should measure about 8 1/4".
  • Lay the two pieces together, mark them to the 8 1/4" measurement and cut away the unneeded section.  
  • Join them with masking tape on both sides of the mat board to hold together. If desired a little glue could be added between the cut before taping together.  
  • These two longer sides may a little unsteady.  To help stabalize the box, cut a bottom from mat board to approximately 8 1/8" x 5 7/8".
  • I covered this base with a piece of batting  (cut to exact size) and then black fabric. The fabric covered bottom is then glued into the box frame. 
  • If desired, glue a cord of choice around the inside edge. 

  • Decorative paper covers the inner covers, spine and inner box sides. 
  • Cut two outside cover panels, a spine and side pieces from the thin wood veneer. Cut the covers and spine with the large journal die and Big Shot. 
  • Cut sides with a metal ruler and X-acto knife on a cutting mat.  NOTE: Cut two 8 1/4" x 1 1/8"; cut two 6" x 1 1/8". 

  • Stamp the images lightly onto the wood covers. 
  • With wood burning tool, trace over stamped design. 
  • Lightly mark dashes with a ruler and pencil on side pieces and around designs on the top and bottom. Wood burn the dashes. 
  • Adhere the  covers, spine and side pieces of wood to the mat board. I used a combination of double-sided adhesive and glue (Beacon 3-in-1).  
  • Place a heavy book on top and set aside to dry well.
  • Lightly shaded all the edges with ink. Allow to dry.
  • The finished stationary box can be coated with a clear matte varnish.
  • Add a closure of choice if desired.


Bottom view of box with woodburned design


This wooden lap desk was the inspiration for the project above. This  lap desk was made about 20 years ago for a submission to a magazine. 


  • Six different cards are created using sets of blank cards with matching envelopes.
  • Decorative patterned papers with coordinating solid card stock are used or the face of each card.
  • Die-cut the solid card stock with the snail mail thinlit.
  • Trim the the printed papers about 1/4” larger on all sides for the first layer on the cards.
  • Add a strip of ribbon if desired onto each die-cut piece of card stock. 
  • Layer print paper then solid paper onto card front with adhesive tape.  
  • Continue to decorate with die-cut felt flowers and paper leaves.
  • Finish with a die-cut salutation. 


Materials

Full size journal #665589
Book box #665873
Black mat board
Thin wood veneer sheet
Decorative paper
Black fabric/batting
Cording
Wood burning tool
Double sided adhesive
Glue
Eileen Hull Designs Stamp images/ink
Masking tape
Button/black elastic
Cropadile/paper brads

Cards (6):

Snail Mail thinlit #665869
Various flower, leaves, salutation dies
Card / envelope sets 4 x 6
Decorative papers
Solid card stock
Felt
Glue
Ribbon

Monday, March 21, 2022

Fabric, Felt and Fiber Make

 A challenge was given for the projects on the blog this month ... using fabric, felt and fibers for a make!  My final result is here and I incorporated all I could in various ways.


The book began with the combining the materials with Eileen Hull's new Book Box die, but without the box pieces.  I felt that i would combine various fabrics for each layer of the book.  I will explain the process and the material chosen for the book.  NOTE: All materials used were sewable materials. The use of my sewing machine was part of the making process.  A list will be provided at the end of the post with the products used. 

I collected pieces from a variety of materials, such as green canvas, cotton prints, seersucker fabric, organza remnants, felt scraps, cotton candlewicking thread and vintage tatted trim. 

In the explanation for creating this project I will not include some visual steps but will describe the  process the best I can. Photos will be included for the purpose of layout and assembling the book.  ***Always read through the post and the steps given.***

The base for the book covers and spine begins with using a heavyweight interfacing cut with the book box die. These three pieces will become the base of the book. NOTE: A heavy canvas or a product like Kraftex can also be used. These type  of materials will make the book flexible and not as stiff as matboard and sewable. NOTE: If a sewing machine is not available the book can be constructed with by glueing with the correct type of glues for fabric.


Layout of covers and spine


Inside view of the stitched covers and spine


Outside view of the covers and green canvas spine stiched together 

  • Cut a spine piece from the green canvas. 
  • Layer the green canvas on top of the spine cut from the heavy interfacing. As in the photos, place the the pieces together to form the two covers and spine. They are overlapped about 1/4" and sticthed together with a zig-zag stick using a sewing machine. 


To create the outside fabic cover panels:

A light colored cotton print was used as the background for the "faux" quilt squares that are part of the front and  back covers. 

  • The fabric is fused with a interfacing before die-cutting the two front panels. NOTE: Use a sewable fusible interfacing. This is a must any sewing by machine is to be done.  ***Some fusible interfacing can gum up the sewing machine needles causing problems.***   
  • Die cut two covers from the fused fabric. 
  • Do note remove the paper backing from the interfacing at this point.


To create the "faux" quilt squares: 

  • Use six cotton fabric prints for the squares. 
  • Fuse each fabric with the same type of interfacing before cutting the squares. 
  • Die-cut four squares from each of the six fabrics. (Total of 24 squares) NOTE: I used the second largest square shape from Tim Holtz Stacked tiles, squares thinlit die set.  
  • Arrange the square shapes onto the front and back covers, over the fabric background.
  •  Space them as evenly as possible before pressing them in place with an iron. NOTE: There is approximately a 1/4" space between the squares and arond the outer edges. ***This measurement can be adjusted to fit all 12 squares on each of the cover faces, to your liking.***   
  • Remove the paper backing from the squares. 
  • Press them onto the background fabric. 
  • Repeat for other cover. 
  • The paper backing can now be removed from the pieces.
  • With iron, press these onto the front and back inner layers of the book.
  • Stitch by machine, using a straight stitch, between the fused squares, both vertical and horizontal on both covers.
 

Layout of front view, but before stitching it in place. 


This is an optional step:

NOTE: For the front cover some simple hand-stitching was added to the squares. Using candlewicking thread, (embrodiery floss can also be used) a large X design was stitched from corner to corner. The center was tacked down with two small stitched next to the center of the X.  ***This step should be done before stitching the panel down onto the heavy layer of the interfacing. Carefully remove the backing paper after the X stitches are added and pressed onto the front cover. 

Adding inside lining fabric:

Inside fabric lining for covers and spine


  • Fuse a second fabric for lining the inside covers and spine of the book, using a fusible interfacing.  
  • Cut two covers and one spine from this fused fabric.  
  • Remove the paper backing from all three pieces. 
  • Fuse them into place on the inside of the book. Begin with the spine piece and then the two cover pieces. NOTE: If desired, after ironing the fabric in place, the three layers could be stitched by sewing machine  around the outer edges of the covers by straight stitch or small zig-zag stitch to hold in place.      

Making embellishments for cover decor:


  • Cut leaves from green felt.
  • Cut flower centers from gold card stock.
  • Cut several layers from organza fabric with thinlits dies.
  • Create flowers from the organza cuts and add paper flower center.

Adding pocket folder and notebooks:


  • Make folder inserts from decorative card stock, with or without side pockets.
  • Cut 12 x 12 paper in half, score down center, score and fold over both sides to form narrow side pockets.
  • Use purchased notebooks and cover the outside covers with coordinating papers OR create you own writing notebooks with signature covers.

Materials 

Eileen Hull leaves die
Sizzix flower dies, thinlits 
Sizzix flower center dies, thinlits
Cotton fabrics, variety colors and prints
Canvas fabric
Coordinating cotton fabric
Felt, green
Organza fabric, pink, blue
Gold card stock 
Off-white candlewicking thread 
Embroidery needle
White decorative flowers
Vintage tatting trim
Fabric glue
Sewing machine
Iron
Cording
Decorative papers
Small note books
Glue
Double-sided tape


Monday, February 21, 2022

Make Unique One-Of-A-Kind Coverings With Gel Prints For Sizzix Die-cut Shapes

Original Phone Stand

Stand with phone

Original gel printed tapes


Time to share a fun technique!  The new Eileen Hull Phone Stand @Sizzix can be decorated in a number of ways. One of the samples I created was done with a technique using a gel press plate and clear adhesive material.  While playing around with one of the many ways to pull prints from a gel plate, I experimented with something a little different from the technique that uses clear packing tape.  With nothing wider in clear tape available then the 2” rolls, I thought to give clear contact paper a try.  I had two type in my possession, one clear and glossy and one clear with a matte finish. Why not give them both a try!

Cut strips from the roll of contact adhesive paper slightly wider then the width of the phone stand. Two strips should be enough to cover the phone stand.  

*** Through the photos, my hope is to show the steps taken when using this technique the best way I can. All gel prints are a series of layering designs on the plate but when using the tape or contact paper the images seem to make the layering more visable. This alone gives the pulled prints a different look. ***

To make the design on the gel plate use the steps that follow - 

NOTE: The most important thing to remember and do is to add the layers of design and WAIT for each application to dry COMPLETELY before moving on to adding more.


  • Gather all materials before beginning. Set up an area for the gel plate with everything you may use within quick reach. NOTE: I use a smaller gel plate as a palette for any paints that will used be better applied then directly to the larger plate, such as brayering small areas, sponging areas of stencils, adding extra design elements in specific areas.


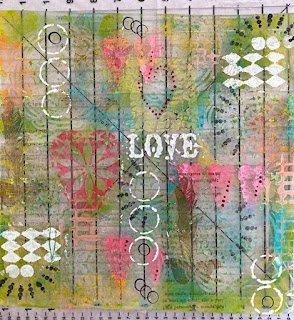
  • Masks from die-cut designs are placed randomly onto the gel plate. NOTE: Masks are cut from waxed paper with the Eileen Hull Heart Mandala thinlit die.  On a small separate gel plate, apply some paint. With a small brayer, add paint randomly around the masks on plate. NOTE: I left some areas without the first color of paint. With a second color of paint, place some drops around the plate in open areas. Spread the drops with the brayer to mix slightly with the first color. Allow to dry; remove the masks from the plate. 


  • The next layer uses designs from a variety of stencils and other colors of paint to build the design. Again, allow to dry before continuing with more layers if desired.


  • The third layer is randomly stamping in different areas of the gel plate with word stamps or other images using an archival ink in black or neutral shade. NOTE: Some images were stamped with Oxide inks. Allow to dry well.

  • The final layer is adding small elements for design purposes. I used the end of a wide plastic straw for circles and the tips (prongs) of a small cocktail fork for tiny dots.  Step away and let the paint dry well (30 to 40 minutes).


  • Place the strips of clear contact adhesive over the gel plate. If any areas of the plate are uncovered, use strips of packing tape to cover the entire plate.  Press down the layers of clear adhesive to the plate well by hand or burnish it with the side of a bone folder. 
  • Pull the tape/contact paper up from the gel plate. Pull slowly, if necessary place back down and burnish more if needed, (some bits of paint just may not come up with the tape, that’s OK).

***As with pulling prints from a gel plate with any materials you must be willing to except the images. ***


To finish the strips for using on projects -

  • They can be layered onto paper surfaces of all types like old book pages,  by applying a coat of gel medium first to hold them in place. 
  • For a more transparent look, brush the back side with mica powders before adhering to projects. 


  • NOTE: the tape/contact paper will have only small sections that still keep its tackiness, but not really enough, making them strips lose much of the sticking ability.  Another way of adhering the pieces are needed. For the phone stand, double-sided adhesive tape was used. 


Gel printed strips are now ready to be cut and applied to the Eileen Hull Phone Stand die-cut shape. 


Materials 

Eileen Hull Phone Stand die

Eileen Hull Heart Mandala thinlit die

Sizzix Big Shot

Gel Press Plate

Brayer

Paints

Permanent ink pad

Stencils

Stamps

Sponge applicator 

Clear contact paper/Packing tape

Mica powder(s)

Brush

Double-side adhesive tape or Gel Medium


Monday, January 31, 2022

New Year, New Eileen Hull Dies - Chapter 1 Release


That time has arrived again - a new release of dies by Eileen Hull.  The new release consists of two Scoreboard dies, one thinlit set and a 3D embossing folder. Let the ideas and crafting begin!

For this post I will be sharing images of the projects made for the release. At a later date, a post will show the process taken in creating the projects. Now's the time to just take in the creativity to be had when working with wonderful designs. You will definitely see them with the group of makers Eileen has within the two teams!

Both the projects here are made by covering the die-cut scoreboard shapes with materials that had been designed on a Gel Press plate.  The book box is covered with cotton fabric that was printed using both acrylic paints and Distress Oxide inks along with stencils and stamped images.  The phone stand is covered with pieces of clear, glossy contact paper that is pulled from the gel plate and then applied to the die-cut surface before assembling.  


Here are other versions of the ways I used of the new releases:

Keepsake Book Box


Washi Tape Covered Phone Stand


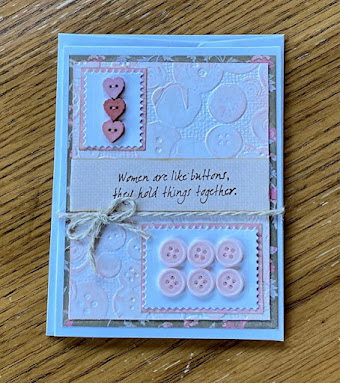
Card with Snail Mail Sections & 3D Folder

HERE IS A MESSAGE FROM EILEEN - 


I am so excited to share my Chapter 1 release with you! The dies in this collection are versatile, practical and fun to embellish.
The Phone Stand, an XL ScoreBoards die, is a MUST- you need one for every room! Make for yourself, family, friends, for gifts or to sell- the die cuts the stand in one pass and is very easy to assemble.

The Book Box can be used to make a book or a box that holds A-2 greeting cards. What a great way to package handmade cards ... or a quick and easy book!

Add the Vintage Buttons folder to create vintage backgrounds for cards, journals, pages and tags. The 3D effect is stunning when you add a little Luster Wax to bring out the highlights...

The Snail Mail Thinlits die cuts a postal pane that coordinates with two of Eileen's Snail Mail Maker Forte stamps. This die was designed to use on the front of an A-2 card!

The dies may be found in local scrapbook stores and Eileen's Etsy store: https://www.etsy.com/shop/EileenHull

So now come follow the links to the other posts for inspiration!

****There's a giveaway too! If you leave a comment for each of the designers in the Release Party Hop, or during the Facebook Live or YouTube video, you will be eligible to win one of the newly released products! Tell us what your favorite new product is and what you plan to do with it! Thanks for hopping with us.****

Tuesday, January 25, 2022

Sizzix Dies Meet Gel Press Printing


It's fun and  interesting when opportunities happen such as this collaboration with Eileen Hull's dies and the wonderful creative products from Gel Press.  Working with amazing products, and the willingness and desire to have some fun experimenting, is a great part of why I have always enjoyed crafts and making things.

I'm not new to the the gel printing process, but have only scratched the surface of what the process is all about. The more I experiment, the more fun and creative it becomes.  I would consider myself more a novice on the topic of gel printing, but an eager learner and one to almost always be up to giving something a try. I just went for it with this opportunity. 


Here is the finished project made with Eileen Hull's newest large Journal die. I will describe in a condensed version the process that I used for making prints on fabric and deli papers to create the covers of the journal and the inside signature folders.  I was pleasantly pleased with the results of the designs on the fabric for the covers, that I chose to keep embellishments very minimal. I love the way the designs from the various stencils appear on the fabric. NOTE: The one thing about gel press printing is that many times it's best to not expect perfect print pulls and go with what you get!


I knew that I wanted to work with fabric for the covers. Never having used fabric in the past for gel printing, I researched a few videos and other information I could find to help give fabric printing a try.  

The printing process began by gathering all the materials I thought I would like to use. In the past I had only worked on small gel plates and a variety of papers for printing.  For this project I worked with a 12 x 12” plate from Gel Press giving me the opportunity to print fabric squares to use for covering the larger journal covers. The other prints I made with the deli paper and the large gel plate could be used as whole sheets or cut into smaller forms.  

In the past printing experiences I have usually used acrylic paints but have also worked with other mediums like distress inks, distress oxide ink and alcohol inks.  For the prints made here I used a combination of acrylic paints and distress oxide inks.

Stencils were the other tools I used for the adding the majority of the designs.  

When putting the journal together, large paper brads were used on the spine, plus some glue, to hold the covers together.  A strip of leftover fabric is glued to the inside spine to hide the prongs from the brads.  Some batting was added to the outside, mat board covers to add some softness to the appearence of the finished journal.  Just for a tiny touch, a simple multi-colored ribbon was added for a closure to tie near the spine of the journal. 

Gel Press prints on fabric 

Front and back covers-outside

Front and back inside covers

Outside Book Spine 

Inside Book Spine

Inside the journal there are five signature folders made from sheets of decorative 12 x 12 card stock.  NOTE: I used papers printed on one side only for two of the signature folders. 


Two of the folders are covered with others prints pulled from the gel press plate with cotton fabric squares. NOTE: I used a fusible adhesive to apply the fabric to the card stock.


The remaining three signature folders are made using a double-sided decorative papers. Gel printed sheets made with the deli paper are used to decorate them. 


Seven  journal inserts - 5 folders, 2 notebooks

It was a fun to be a part of this collaboration.   

Links to information on everything Gel Press:

Gel Press YouTube

Gel Press Facebook

Gel Press Instagram

Gel Press Pinterest 


Materials

Eileen Hull Full size Journal

Gel Press Plate

TCW stencils

Acrylic paints

Distress Oxide inks

Brayer 

Mat board

Cotton fabric squares

Deli paper sheets

Decorative card stock 

Gel medium 

Adhesive sheets

Fusible iron-on adhesive

Fabric glue

Large paper brads

Bias tape/ribbon

Elastic

Assorted tiny embellishments (buttons)