Wednesday, March 16, 2016

Shiny Travel Accessories With Metallic Oly-Fun

It was a couple of years ago that I became aware of Oly-Fun by Fairfield. It comes in a nice variety of colors and is easy to work with.  It can be sewn, painted, glued, die-cut and manipulated.  When I became aware of the newest editions of Metallic Oly-Fun I looked forward to working with it.

With three of the four new color samples, I decided to create some easy travel accessories.  Each of these are made by layering the metallic Oly-Fun with cotton batting and a printed fabric.

Shoe Bad with Brass Oly-Fun

Curling Iron Bag with Silver Oly-Fun
Zippered Pouch with Gold Oly-Fun
There is a giveaway with this blog hop.  One bolt of Oly-Fun Metallic of your color choice will be the prize (US and Canada only).  Readers enter to win via Rafflecopter on the Designer Craft Connection blog.


Wednesday, February 24, 2016

ETI Blog Hop

Creating with interesting products can be challenging but it is always fun and interesting.  I have experimented with some of the products from ETI.


What I created used EasySculpt®, which is a epoxy sculpting clay from ETI.   I should note that I could have also used EnviroTex Jewelry Clay® with the same results.  Since I had not used the EasyScuplt® before this gave me the opportunity to learn how to work with this product.


Please read all the instructions that are included in the package.  When using any of these products that need to be mixed I always use latex gloves.


Once the clay was mixed well I began to create the pieces.  For the focal piece, I used a flexible mold. For the triangular pieces, the clay was rolled out on a silicone mat to approximately 1/8" thickness.  Using a texture sheet, press it onto the rolled clay to make the impression.  Use a metal clay cutter to form the pieces.  Use a toothpick or a piercing tool to form a hole near the top of each piece.
*NOTE: The clay can become sticky while working with it, and can stick to the gloves, molds, and other tools.  It is best to use either talc or vegetable oil to eliminate this issue.


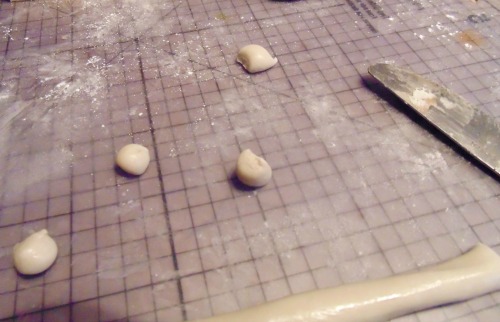
Roll beads from the clay.  My beads are not perfectly round or the same size on purpose; I wanted them to have an organic look.  Immediately pierce them with a wire or piercing tool.  Make the hole large enough for stringing onto string or wire.
*NOTE: Coat a length of wire with vaseline and string the beads onto the wire till they dry.  Hang the wire between two cups or glasses so the beads do not flatten.  Twist them from time to time through the drying process.   


When all the clay pieces are hard they can be painted.  I gave them one coat of black acrylic paint.  The next color was a thinned coat of copper metallic. It was lightly brushed onto each of the pieces.  The last color was a metallic green that is very lightly brushed on for an accent.

I completed the necklace by adding some other accent beads along with all the pieces formed using the EasyScuplt® clay.

Materials

EasyScuplt®
Clay molds
Texture sheet
Acrylic paints: black, copper, metallic green
Beading wire
Jewelry tools
Jewelry findings, crimp beads, closures
Assorted coordinating beads
Ribbon

*** Today, February 25 there will be this ETI blog hop for Resin Crafts - check out all the posts for creative ideas.


Friday, February 5, 2016

Show Some Love


Start with this booklet filled with a nice variety of techniques and add some Fabric Elements™ by Rebekah Meier and you can end up with something fun and pretty to display in your home or give to a friend.


This burlap banner combines several techniques found in the booklet.  I used a number of the products in the Fabric Elemens™ collection developed by Rebekah for Fabric Editions.

Materials used for this project include - Burlap Banners, Pink Dot, Waffle Muslin, Wool Felt, Tissue Pack, Stencils and Lace Trims, plus paints and gel medium.


Monday, February 1, 2016

Designer Craft Connection - Show Some Love

February arrives and with it comes a special day to show and express LOVE.   Why not show it and express it every day!

There is an easel with a blackboard,  that I recently restyled from a plain wood finish with a crackle finish.  It is located near the front door in the entryway of the house.  It is the perfect addition to make a statement to anyone entering.


Recently I created a banner made from materials of the Fabric Elements™ line by Rebekah Meier and wanted to share it with everyone.

To make the hearts, I die-cut a base from white poster board.  After surface painting a white-on-white fabric and the waffle muslin fabric from the collection, they were also die-cut in the same size.  Two pieces of iron-on, fusible interfacing were cut to match and used to apply the fabrics to both sides of the poster board base.  (The decorative fabric on the front, waffle fabric on the back.)

The next layer was a smaller heart cut from batting and then trimmed with pinking shears around the edges.

The top layer is made using painted lutradur and finishing with stamped letters from Ann Butler's collection of stamps.  This heart shape is cut one size smaller than the batting layer.  This layer is sewn with a zig-zag stitch to the batting layer before being glued onto the larger hearts.


Decorative trim is glued to around each of the hearts.  Punch holes on the sides of each heart to add strips of fabric for tying them together and for end ties.


Monday, December 7, 2015

Designer Craft Connection - Handmade Holiday Decor Ideas

It is truly beginning to look a lot like Christmas!  Each year I tell myself there is no need to add anything new to the large collection of holiday decorations I already have.  Then inspiration strikes or I see something I would like to try and find a reason to create new decorations.  This year I have a couple of new additions.  I will also share some that have been around for a number of years and are family favorites.

The newest are the holly painted white burlap runner and the square glass candle holder with holly & berry embellishments.  NOTE: I also use handmade gifts from friends (the snowman) and a simple chalkboard to add more holiday flair.


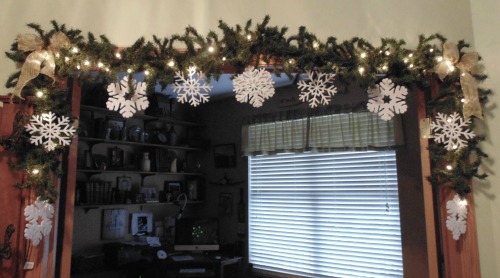
My holiday decorations always begin with lights.  I have changed over to all clear lights.  The bulbs can vary but the remain clear.  They are wrapped on garlands that are hung over doorways  and windows or for stairway railings.

Handmade wooden reindeer, vintage glass ornaments in a vintage sleigh.

Handmade stacked benches hold a basket of vintage cookie cutters and other holiday-related items.

An old slate board gets a special holiday message and simple, tiny brush trees add a holiday touch.
I use elements that I already have as part of my decor and just add or change them up to show-off a holiday theme.
A tiny mitten banner made from handmade paper hangs on a vintage coat rack in the front hall.
A fabric and paper JOY banner on the guest room door.

One of my favorite decorations to use around the house anytime are banners and during the Christmas holiday season they are definitely utilized.  I have made several different kind through the years.  Many are used at home and many have been given away.
Assorted jars, epsom salt, ribbons, embellishments, and tealights
Here are candle jars made from an assortment of glass jars.  They can be used anywhere, alone or clustered together for a warm festive glow.  I instructed a group of ladies from our community on how to create them and each one was so unique.

I could go on and on with photos of handmade decorations that I made or received from others, but I end with one that was made several years ago from a small doll house kit.


Normally I begin the process of decorating the house the Saturday after Thanksgiving.  Unfortunately that was not the case this year.  I'm still putting things in place here and there around the house.  I hope that the few visuals I shared here will give you some inspiration to create your own versions of handmade decorations of you own.  Make something for yourself or someone else - Enjoy the Holidays!!!  Please check out the Designer Craft Connection Blog and Facebook page for more ideas from several others - DCC Link - Facebook Page Link


Tuesday, October 27, 2015

Fabric Elements™ Travel Tags

When it comes to traveling and baggage, why not add something special.  Here I created two tie-on tags to make my luggage stand out and easier to locate.


For the tags, I used two of the techniques found in the "Techniques for Mixed Media" booklet that is available with this line of Fabric Elements™by Fabric Editions.


One used the patchwork technique with several of the fabrics and the other was using the fabric fusion process.  With both techniques, paints were added and muslin fabric was applied to the backside to create the tags.  Some machine stitching was also added to each, along with a fabric tie.  NOTE: Refer to the photo below for marking and cutting the opening for the tag information. Finishing the tags can be done with sewing or glueing. To add protection to the name and address, insert a piece of clear plastic to the inside opening.


There is a challenge going on for anyone to enter.  Details can be found on the  Fabric Editions Blog. A very nice prize awaits the winner!

For more information about Fabric Elements™ from Fabric Editions here are links to the Blog, Facebook Page, Pinterest Boards, Rebekah Meier's Facebook Page, a link to my Fabric Elements™pouch project, another Fabric Elements™ project

Fabric Elements™ can be found at JoAnn Fabrics stores.

Projects made using Fabric Elements™ Kits

Thanks again to Rebekah for the opportunity to create and have fun with this wonderful new line!

Thursday, October 22, 2015

Big Ideas With Little B Products

The products from Little B are completely new to me.  The package I received from the company contained a number of interesting products.  Many of the items were specific for Autumn so the little project I created used several of the Washi Tapes.  I look forward to using the other items in future projects.


I made a special little container for a couple of sweet little "Trick or Treater's".  To create them I used my Sizzix Big Shot along with Eileen Hull's Train Case die.  I covered the scoreboard with the tapes. The tape was put on the board carefully to cut the top pieces of the case with the zig-zag designed tape.  Others were put in place for the bottom pieces.  Cut two of each for the train case.  Layer decorative paper and a thin sheet of black Makin's Clay with double-sided adhesive.  NOTE: Pieces can be cut individually from paper and clay and then glued together if desired.   Die-cut two hinges and the handle from the prepared sheet.  The front latch is cut from another piece of textured Makin's Clay.


Assemble the train case using double-sided adhesive tape or any glue that would work best with the materials used for the train case.

Glue decorative cording of your choice around the edges of the case top and bottom (refer to photo).

Pierce holes to insert paper brads for the hinges and latch.  Glue the handle in place on the lid of the case.  Embellish as desired to finish the look.

Materials

Little B Washi tapes
Big Shot
Eileen Hull Train Case die
Scoreboard or Mat Board
Glue
Small amounts of Makin's Clay
Small amounts of decorative paper
Double-sided adhesive sheet/tape
Paper Brads
Jute Cording
Decorative Ribbon
Decorative Button
Wire


Check out all the other participating blogs for other ideas showing how to use the products from Little B.  Follow the Designer Craft Connection blue button to move from blog to blog or the Designer Craft Connection Group Blog page to see all posts..


Enter to win a "giveaway" from Little B.  Here is the selection of products from Little B that you can win:


To win, go to the Little B Facebook page and "LIKE" the page and leave comments for the designers. Enter giveaway HERE: a Rafflecopter giveaway


Monday, October 5, 2015

Happy BOO Day

October has arrived! Just as at Christmas time, I enjoy creating handmade decorations for this time of the year.  This year I decided to try a different look with a mixed media collage canvas.


Materials
12" square canvas
Fabric Elements™ Fat Quarters: Green Dot, Orange Dot, Artistic Lines, Spirals
Fabric Elements™Tissue
Fabric Elements™ Wool Felt
Fabric Elements™Batting
Muslin
TCW Stencils by Rebekah Meier: Assorted Designs
Earth Safe Finishes Gel Medium
DecoArt Media Fluid Acrylics: Various Colors
Brushes
Cosmetic Sponges
Metallic Threads
Buttons
Sewing Machine
Decorative Paper (backing)
Ribbon
Wire
Fabric Glue
Wood Easel (optional)

For this project, I used various mixed media products.  The majority of products are from a new line called Fabric Element™ by Rebekah Meier.  To create the pumpkin, leaf, stem, sunflower and fence I used various fabrics from the line.  The pumpkin, leaf, and flowers were made by layering the fabric, batting and muslin in three layers.  I sketched the shapes of the pumpkin and leaf onto the fabric.  Using a sewing machine I used a zig-zag stitch for the outline of the two shapes.  I used a free-motion stitching techniques for the veins of the leaf and for the sunflower shapes.  The leaf and pumpkin are trimmed with pinking shears; the sunflowers are cut with scissors, close to the stitching.  All of the fabric pieces were painted with fluid acrylics that were diluted with water and brushed on to your desired look.  The sunflowers have buttons sewn to the centers with metallic thread.


To create the stem of the pumpkin, roll a strip of wool felt, layered with a strip of muslin into a tube.  Wrap the tube with two colors of metallic threads and tie the ends.  Wash the tube with thinned brown paint.  Set the tube aside to dry.


A strip of the "artistic lines" fabric was torn with the lines resembling a fence.  The piece can be tea-dyed or stained with a fluid paint wash.  This strip is added to the canvas using gel medium and after all the stenciling is completed.


The canvas is given a light blue acrylic paint wash.  Strips of aqua tissue are torn for the sky.  The green tissue is used at the bottom of the canvas for grass.  A piece of decorative tissue is torn into a circle shape for the sun.  All the tissue is applied using gel medium.

When the gel medium is dry, begin stenciling.  Stencil the tree design with brown paint.  A leaf design used vertically was stenciled with various colors to resemble bushes.  Circular designs were stenciled over the circular tissue in yellow and golds.  Flower stem designs are stenciled near the bottom right of the canvas.  Flower head shapes were first stenciled onto the spiral fabric using several colors of thinned paint before the free-form stitching is done.  To finish the canvas, stencil the word "Happy" with white paint near the top.  White glitter paper was used to die-cut the word "BOO".

The finished pumpkin shape is glued to the canvas with fabric glue.  NOTE: A small amount of stuffing is placed under the pumpkin to give it shape and dimension.  The stem is glued to the top of the pumpkin, tucking the lower edge under the pumpkin.  Shape the leaf by folding and gluing slightly near the stem of the leaf.  Glue the leaf in place, tuck the stem under the top of the pumpkin.

Cut two lengths of green wire.  Wrap the wire around a smooth pencil to form tendrils.  Remove the wire from the pencil and pull the ends out to shape the tendrils.  Glue them into place, hiding the ends under the leaf.  Glue the sunflowers onto the canvas above the stenciled flower stems.  Glue the word BOO near the bottom left corner of the canvas.

To finish off the canvas, glue a decorative sheet of 12" square paper onto the back. Trim the edge of the canvas with ribbon.  Use an easel for display or add a hanger to the back of the canvas if desired.

Many of the techniques for working with Fabric Elements™ can be found in the booklet that is also available.  It is called "Techniques for Mixed Media" and shows 12 different techniques for creating interesting mixed media projects that are all interchangeable.