Showing posts with label #createwithdies. Show all posts

Sunday, April 2, 2023

Spring Has Sprung, Plus A New Dies & New Ideas

Chapter 2, 2023 Eileen Hull/Sizzix collection has sprung!

The new set will work with so many of the other dies designed by Eileen.  

There are three dies in the set: the Card Case, Mini-Slimline & Tickets and Journaling Card, Envelope & Windows. NOTE: Buy all three dies and get FREE SHIPPING on your order in the US PLUS save an additional $10! Cost to buy dies individually is $122- buy the bundle and pay only $112. Outside US, I will deduct $10 from shipping.

The Card Case is a Bigz XL ScoreBoards die. This die is specially designed to cut and score thick material up to 1/16" like matboard, chipboard, leather, felt and fabric so your finished project is nice and sturdy. The finished Card Case die measures 4 1/2" x 3 1/2" and has an adjustable spine that goes from 1/2" to 2 1/2". This is the perfect size journal to hold your 3" x 4" journaling cards, as well as other small items like wallet photos, ATCs and ephemera. There is a swing out flap on each side where you can add pockets or small insert books- you decide what combination you want to do. Make the spine thick or thin- your choice!

Here are a few photos of how I used Eileen's new dies:

The projects below ae made from various materials that I enjoy incorporating in most projects I make with Eileen's dies. Though paper is a wonderful material to use, I guess the challenge of what other materials can do is something I enjoy! These projects use other dies for embellishments and other purposes from collections of Eileens's and others from Sizzix. They co-ordinate well and show the versatility of Sizzix dies.

Muslin covered and stenciled card case


Inside fabric card case

ATC cards and pockets


Card case made from acrylic package and rice paper

ATC cards and pockets


The Journaling Card, Envelope & Windows die has 6 pieces- an envelope, 3" x 4" Journaling Card, three window cutouts (use with envelope to remove and back with glassine like a window envelope) and a tab. The Envelope measures 4 1/2" x 3 1/2" and fits perfectly inside the Journal! Or use it by itself and add your favorite ephemera pieces.

Double Envelope Holder

Envelope Holder with Journaling Cards


Envelope Book

Journaling Cards for Envelope Book


The Mini-Slimline & Tickets die design is similar to the Snail Mail die, which was very popular for creating faux postage stamps. There are four dies in the set- one is the size of a mini slimline card and one is a mat that may be placed behind the perforated piece. The other two pieces are a row of tickers and mat that goes behind that. When you fold over each perforated piece and tear it, it creates individual faux postage stamps and tickets! Die cut the piece from patterned paper for an amazing background- just add a sentiment and let the paper do the work.

Birthday card set

Birthday card / Set of four


Thank you cards

Thank-you cards / Set of four


MORE INFORMATION 

****There's a giveaway too! Comment in the Facebook and YouTube streams and tell us which of Eileen's other dies would work well with this collection. You have until April 10 to post your comments.

****Watch my YouTube channel to see die assembly and project ideas! Eileen does two livestreams each week on Facebook and YouTube-sharing more ideas on how to to use these dies in lots of different ways. 

****You are invited to join the creative community Facebook group, the Eileen Hull Fan Club, where you'll find special events and exclusive content. Follow Eileen on Instagram at @eileenhull!

There are lots of samples so, make sure to read the blog and be watching social media to see all the makes! LIST OF HOP STOPS:

Eileen Hull Designs << you are here
Pam Bray
Jennie Atkinson
Sarah Lizzie
Lisa Hoel
Susie Bentz
Tonya Trantham
Jenny Marples
Maggi Harding
Karen Bearse
Sue Eldred
Sharon Curtis
Teresita Arvelo
Madeline Arendt
Cheryl Bodkin-Waters


Tuesday, June 21, 2022

Leftover/Unused Die-cuts Become Something New


There are several unused die cut pieces that I keep handy in a container as well as an array of unfinished and unused embellishments. 

Since the majority of elements for the vintage truck and the camper (minus just a couple) were available in my stash, plus with the 4th of July only a few weeks away, I felt it called for some new summer holiday decor. 

The basic main, precut pieces were were painted either with red paint and blue paint.  All tires were painted black. The hub caps, the camper door and window were colored by rubbing them with silver Luster wax. The lower decorative strip on the camper is covered with metal tape.  

Once the truck and camper were constructed, a piece of styrofoam was cut to place into the open area of each piece.  Several star shapes were die cut from gold card stock. A toothpick was glued between two star shapes and they were used to fill the truck, along with several paper flags.  A large leftover rosette from an older project was glued to a popsicle stick and placed into the styrofoam inside the camper. The missing pieces were the hitch element, so I found a way to attach the ring element from the folio die to both the truck and camper.  A screw fits into the small end on the one on the back of the truck; while a small elastic band, attached to campper piece can be connected over the screw to hold the two larger pieces together.


Another photo view of the display, this time along with some of the other "leftover" and unfinished projects projects on the left side. Determined to get the one Pass Book and two wrapped journals finially completed this year to add to my red, white and blue decor items.  On 

On the right side is a near complete work in progress!  Inside the fabric covered book (Folio Journal Die) is another version of the shadow box frames.  Will share them all soon!

Happy Making to All!

Tuesday, April 26, 2022

Info & Tips for Creating with Shadowbox Frame Dies


Working with the newest release of dies by Eileen Hull for Sizzix has been a fun! Different from most of Eileen’s scoreboard dies, but still with loads of creative opportunities.

Thinlit dies vs. Steel rule


With this post I will share sample ideas and some learned tips since working with them, but not typical instructions and steps. As with anything new, be it ideas or tools, there is a "learning curve". That being said fit’s been enjoyable and a bit addictive working with the new dies. 

The important part to note is that they are constructed from heavy weight papers and not mat board.  I have been doing some experimenting with various types of papers to construct the frames and sure that more will continue.

The first project that I created with the frames were three graduated sized squares to hold dimensional arrangements.  The ideas for dimensional designs or arrangements are endless. Stay simple by matting photos into the frames for displaying in groups, or get creative with dimensional creations.  The basic frames were made from watercolor paper and then collaged with old dictionary pages. This process came with some learning and tips to share. 

Collaged Shadow Box Trio 

The next project was to use them to assemble a hinged, fold out photo display. This can be kept simple too with just photos or add a bit of dimension into the frames. More ideas using similar construction are in the works now.  

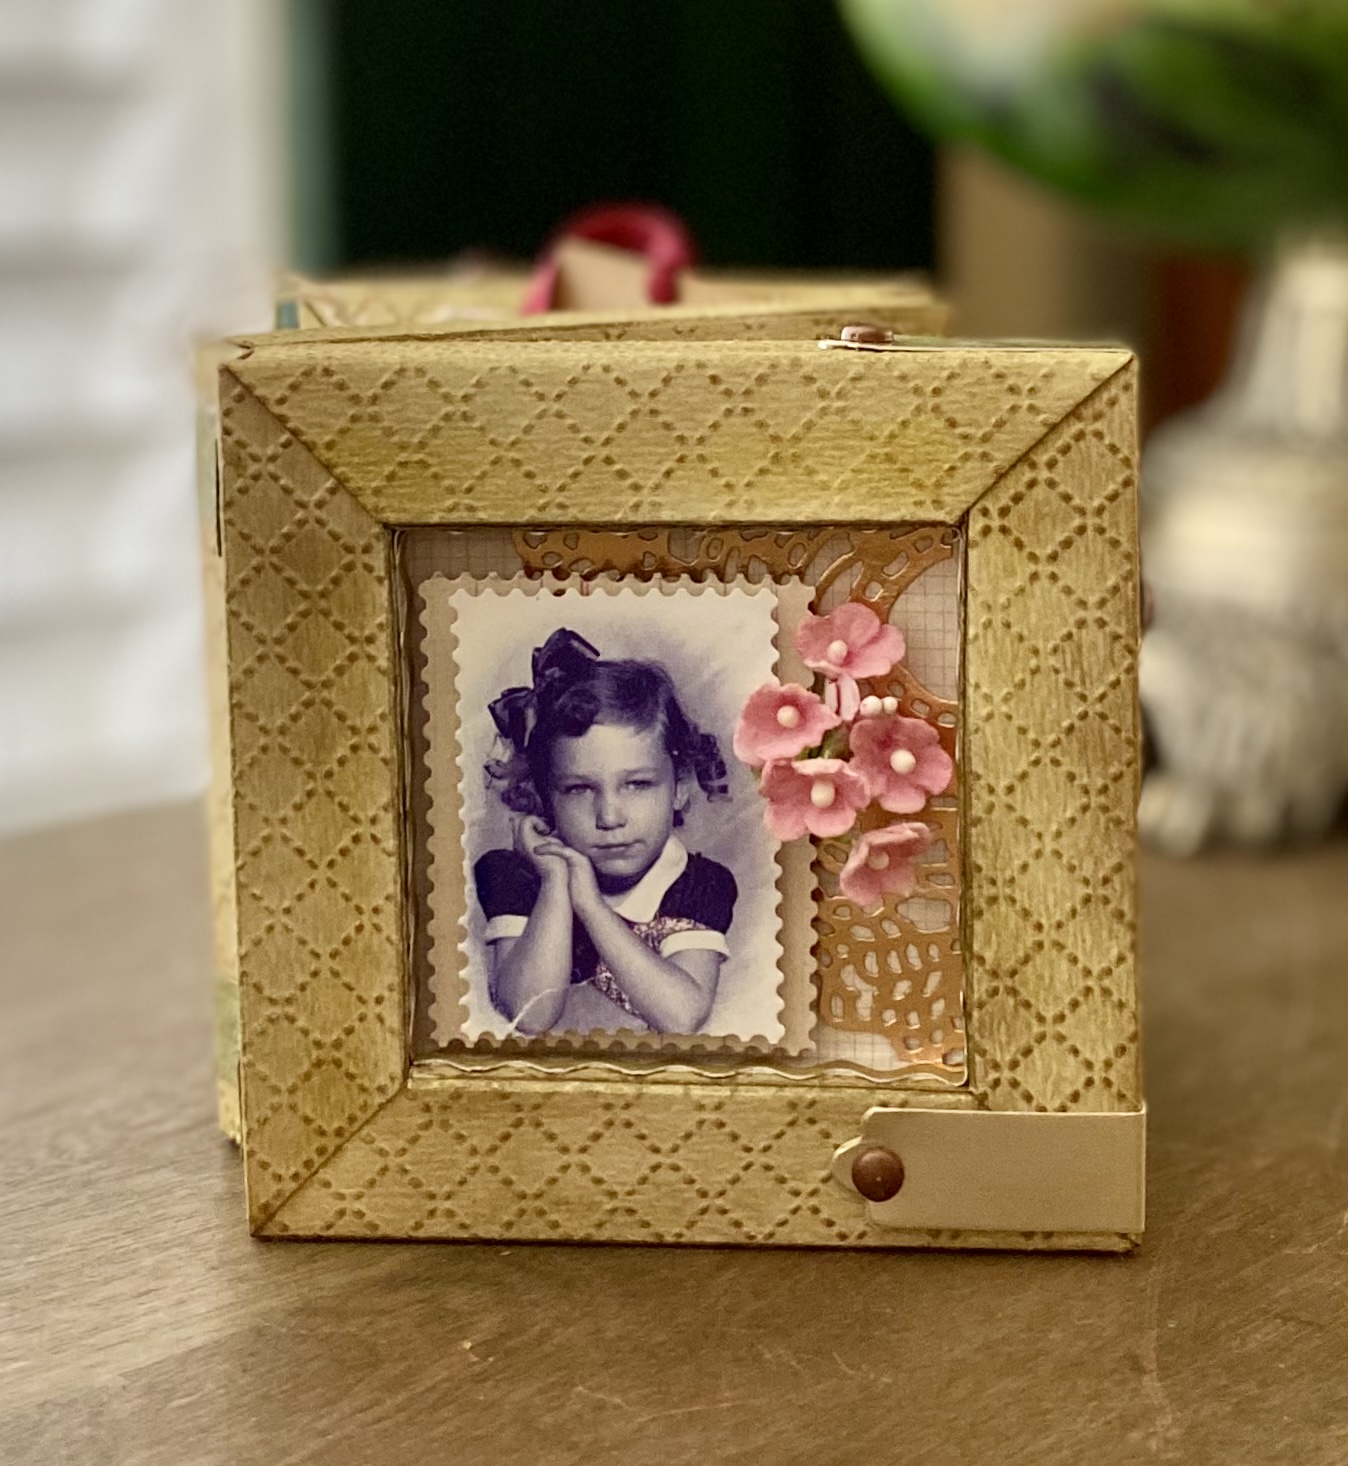
Embossed Accordian Frames


Hinged Accordian Frame


Inked frame components

Embossed, inked, shaded components

Decorative dividers for inserts 


While working with these thinlit dies and assembling the frames, I have learned a few tips that I would like to share. NOTE: We may all interpret directions slightly different, and find our very own methods that may differ somewhat from actual directions. Find what works for you! Remember the learning never stops!


I feel one of the first thing really needed when constructing the frames, of any size, should be to understand the weights of different papers.  I’ve used different weights, from 90# to 140# for most of the frames. These weights are considered heavy weight papers.  A few papers that would be good to use are:

Sizzix papers (approximately 90#)

Bazzill papers (approximately 100#)

Distress watercolor card stock (118#)

Distress heavy stock (110#)

Watercolor papers by various companies (90# to 140#) found at craft or art supply stores  


Links to a site that help explain the weights of papers: 

Found on Scrapbook.com website - YOUR GUIDE TO PAPER WEIGHTS


For the frames I have created so far, I have used papers from 65# to 140#. 

I have also experimented with thin paper board like white poster board sheets from craft stores and gift boxes and cereal/cracker boxes. Materials like this would probably be considered as extra heavy weight. I likely wouldn’t use anything heavier then the cereal boxes.  Of course if using such materials they would have to be covered by either painting, inks, mixed media finishes or with collaged papers. NOTE:   Another tip that may be helpful - if using something extra heavy - after cutting the four pieces, it may help the folding by going over the score lines again using a scoreboard and scoring tool. I found this step useful. 

Gesso covered frame from packaging

Frames from heavier packaging materials 

Thin poster board, covered with decorative paper

Frame from file folder


When using a paper with a patterned design, I have found it necessary to be aware of the direction of the design before cutting the four pieces needed to make the frames. An all over design can be cut without a worry. There are designs were we immediately know the pattern direction and others that may not be as easy to notice.  Here are some examples and how to cut the four frame pieces: 

Assorted patterned cardstock

Cardstock with all-over pattern

Obvious directional pattern paper

Directional print pattern paper


Another experiment was with embossing the papers before constructing the frames. Here again some experimenting took place.  I found better results when using embossing folders that are not the 3D, thicker folders.  It seemed to me that they distorted the paper pieces making them difficult to fold properly.  The folding lines do disappear from the deep embossing; you can replace them with a score board and bone folder.  Give it a try and see what results you may have. I cut the four pieces needed for the frames before embossing. Also the coloring  (by ink or paint) was added before the embossing.  NOTE: Highlights can be added after embossing if desired. Use inks, dry brush paint or metallic rubs.

Embossed frame pieces vs. plain

Difference of embossing folders


Again remember that frames may be made from plain papers or file folders or gift boxes/cereal boxes can be painted or use texture paints alone or with stencils to add design or texture to the frames. Collage with bits of thin papers and gel medium.  Gesso was added to any packaging with printed designs before decorating with any method desired. 

Frames made from various 85# cardstock

***The next thing that I will be experimenting with is making different size frames by slightly changing the measurements of the frame pieces. That can be accomplished by trimming from the straight edge of the four cut frame pieces. ***


STILL TO COME ... Two ideas still in the works will combine the Book Box die with a frame and the other will use the Folio Journal with two frames.

Book Box die with Shadow box frame insert

Folio Journal with two shadow box frames inside


Monday, April 4, 2022

Collage Frames x 3 + Accordion Shadow Box Frame

New Eileen Hull die release today!  New in more ways then the release date. These dies are all thinlit dies and along with the three sets of dies is a beautiful 3D embossing folder. 


I was excited to work have the opportunity to work with these new designs.  Once seeing the process  of constructing the frames, the challenge of the creative element of the making process went into affect.  Today I will share the set of three shadow box frames and an accordion-style three-dimensional display frame that can sit on any shelf.  At a later date the making process will be shared for these projects. 

As with other releases Eileen will have a “give away”. Details are as follows: 

GIVEAWAY: Comment on each participating designers blogs and during the live on Tuesday and let us know what you would create with these dies and you will be entered to win one of the items in the Chapter 2 release!


A trio of three-dimensionsal frames were made from heavy stock paper for both of the shadow box projects. I found that using a 120# watercolor paper worked well for both.  Each of the three square frames were collaged with torn dictionary pages and aged with inks before being given a clear coat of varnish.  Fill with any variety of embellishments to fill the frames. A ribbon hanger was added for hanging. Each is backed with a piece of burlap paper for a neat finish.


Video link from Eileen Hull Hub

Link to Eileen Hull Designs Blog


Another project to share with you is this accordian style three-dimensional frame I enjoyed creating. Made with three of small shadow box frames, they connect with hinges so the frames can  unfold and are decorated on both sides. It can sit nicely on a shelf or table.  


Wednesday, December 22, 2021

A Christmas Star Shines

To continue with the theme of "little and small" good things, and one more share of "Comfort & Joy" for Eileen Hull's Fan Club.


So on "Christmas Eve Eve" here's an idea for making a small star book before the holiday celebrations start!


Materials

  • Tiny book die
  • Glitter paper 
  • Decorative papers, assorted (3)
  • Ribbon, closure
  • Double sided tape, 1/8" or 1/4"
  • Various flat embellishments


  • From chosen papers, cut a cover.  ( I used a gold glitter corrugated card stock because it was sturdy but still flexible.) Insert pages are cut from decorative paper sheets. 
  • Cut the papers for the inserts with the tiny book die and the trim accordingly to create the folded pages. NOTE: I cut papers for 5 pages. This is a tiny book and thinner papers work best when layering them for the star effect. Cut papers one at a time, instead of stacking together, so the crease does not cut through. ***On mat board it would create a score line for folding that you don't need for this project.

Sizes for the papers for the folded inserts are:

Make 5 sets with 3 layers

3” x 4 7/8”

3” x 4 1/4”

2 3/4” x 3 3/4”


  • Use a scoring tool to crease down the center of the cover piece (The fold line will run down the center between the 2 original scoring lines.) 


There are many places to find instructions and ideas for making star books online. If more detailed instructions are needed refer to finding videos online on You Tube or other sources.

  • Each of the three cut papers for each of the five sections will go together the same way. The sides edges can be glued or use double sided 1/8" tape to connect them all. 


  • When all five sections are complete, connect each of the five sections with either tape or glue along the outer edges, before adding the layered five page section to the cover.  


  • Decorate the pages as desired with flat embellishments like small die-cut images or stamped words or verses. 


The book can be opened to form the shape of a star. The ribbon tie can be used to hold the book open as well as a closure.  A tiny clip can be added to help in holding the book open if so desired.  By using a flexible type of cardstock for the cover will make the opening of the book and folding the covers back easier.