Tuesday, May 22, 2012

Seasons, Home & Holidays

"The seasons are what a symphony ought to be: four perfect movements in harmony with each other."  - Arthur Rubenstein

The summer season is upon us once again.  We had a little tease a few months back which caused so much of nature to be fooled into plants blooming much earlier then usual.  The weather sure can be fickle!

Now we are approaching the first "holiday" of the summer season.  We celebrate Memorial Day on the last week-end of May, instead of it's true date of May 30th, and it will be here in a few days.  Where or where do these days go?  Didn't we just celebrate Easter?

With the beautiful weather this past week-end I decided to do a little annual summer planting.  The plan this season is to keep it easy to take care of.  I do enjoy visiting Garden Centers and Nurseries to see all the wonderful plants and look for the unusual or interesting.  I may ask the family to help me dig up a small area near the garage to plant a hydrangea.  I have come to love the new varieties there are.  Some favorites I planted are a new very vibrant petunia, Superbells (love the colors these come in), Sweet Potato Vine and African Daisies (love the shades of these too).

        "Be like a flower and turn your face to the sun."  -  Kahlil Gibran


With all three summer holidays being very "American"  I put together a quick banner to hang from the porch railing.  Took several flags off sticks and glued them to a cotton cord and then added gold foil stars for a homemade "All-American" easy decoration. 


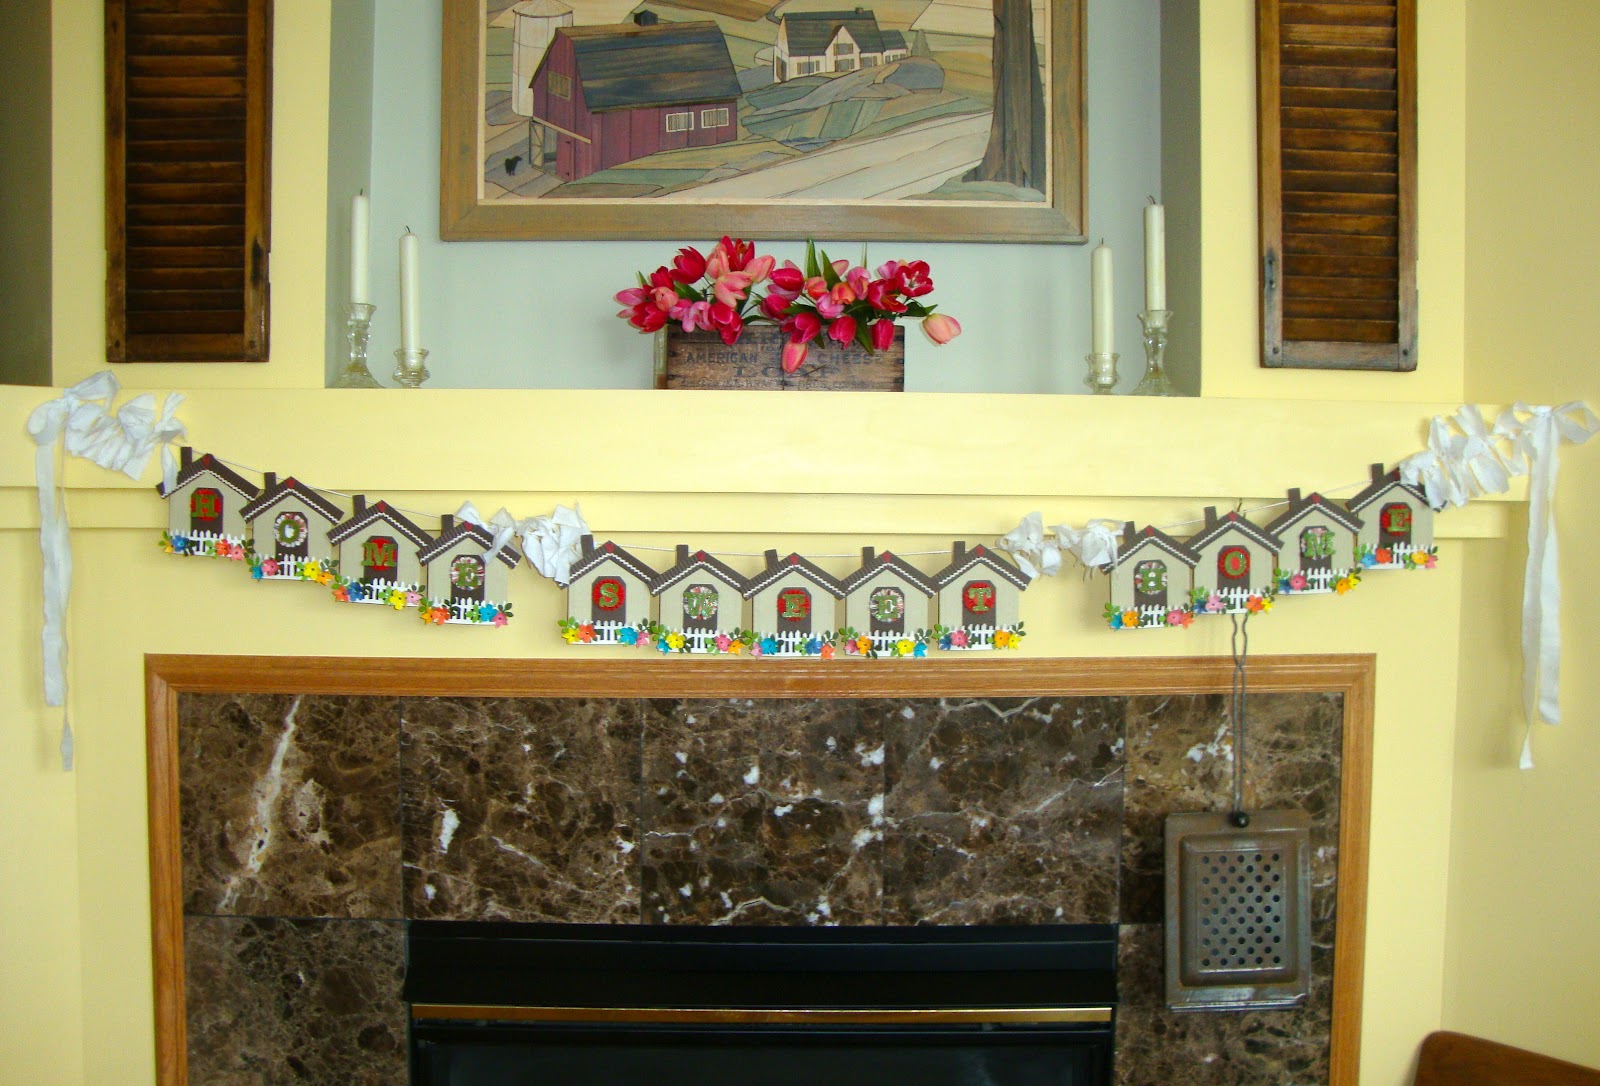
Had to come up with another idea for a banner to hang above the fireplace.  Again I pulled out my trusty Sizzix Big Shot and dies, some paper punches and a bunch of scraps to create a banner for my 
"Home Sweet Home"!


Materials:
Variety of paper scraps
Sizzix Big Shot
Sizzix Dies: Original Pocket, Rectangles, Round A Bout Alphabet, Over the edge "On the Fence", Mini Paper Rosettes, Tiny Tabs & Tags
McGill Paper Punch, Mini Flowers
EK Success Leaf Punch
EK Heart Punch
Mini Rick-Rack
Beacon Adhesive Zip Dry Glue
Ranger Stickles
Ranger Distress Paint-Picket Fence

Here is a link to the post from last summer with another banner idea:
http://madelinesthoughts.blogspot.com/2011/06/junes-designer-craft-connection-red.html
This will be going back up for the summer to replace the "butterfly & flower" garland in another spot.


Saturday, May 12, 2012

ImpressArt Metal Stamp Challenge

Let me begin just by saying this challenge was fun and I am so grateful that I was able to participate.  So much to share and so much to tell so let's begin...

I was unfamiliar with the products by ImpressArt and when the package came with the materials to be used for the challenge, I must admit I found it a real challenge...but I'm always up to the challenge and happy to try and learn something new.  I have had experience working with metal but embossed metal work, not stamping.  After playing a little with the materials sent I came up with four different projects.  The main project that you will see here is one where I use several items in the package received and tried to use them a little differently.
Catch A Dream
Materials
ImpressArt Alphabet Stamp Set, Newsprint
ImpressArt Design Stamp, Fun Star
ImpressArt Stamping Blanks
     Petal 2", Nickel Silver
     Chandelier with ring, Copper
     Feather with ring (1 1/16"), Brass
     Star with ring (7/8"), Brass
ImpressArt Metal Stamping Hammer
ImpressArt Steel Stamping Block
ImpressArt Stamp Straight Tape
Mercart metal 3 or 4 prong scratch tool
Sizzix Big Shot
Sizzix Diamond #2 Die
The Warm Company Steam-a-Seam
Paper, colored
Fabric Scrap
Metal Scrap (or a Chipboard Scrap)
Ranger Adirondack Acrylic Paint Dabber, Copper
Ranger Crackle Accents
Ranger Distress Stain or Distress Ink Pad, Broken China
Ranger Adirondack Marker, Pitch Black
Natural Thin Jute Cord, May Arts
Beads
Paper Awl
Jump Rings
Jewelry Pliers
Beacon Adhesives Quick Grip

Metal Pieces:
1.  Begin with the Copper Chandelier shape; place on stamping block and with stamping hammer, hit piece repeatedly to give the piece a "hammered metal" look.
2.   Use two small pieces of the tape to hold the brass star w/ ring onto the stamping block.  Using the "fun star", hammer the design randomly on the surface of the entire star.  Rub the surface with the black Adirondack marker; then wipe the surface with a small soft cloth or paper towel to remove the surface ink.
3.  Tape the brass feather w/ring onto the stamping block. Use the "dash" from the alphabet set to stamp a line down the center of the feather shape.  Draw the scratch tool from the line out to the edge to texture a featherlike look to the piece.
4.  Attach the chandelier shape onto the silver petal shape with a small amount of Quick Grip before stamping the word "dream".  NOTE: Refer to photo of piece for placement.
5.   Tape the layered piece onto the stamping block to hold in place.  Apply a piece of tape along the petal piece just below the area the word will be stamped.  NOTE: Mark with a line as a guide for each letter.  Strike the metal stamp with medium pressure to make the impression for each letter. Color over with the marker and wipe before ink sets to make letters pop.
Diamond shape:
NOTE: I use a product called Steam-a-Seam to adhere fabric and paper to surfaces, but a glue could be used instead if desired.
6.   Crumble the paper scrap and then smooth.  Randomly wipe the surface with the copper paint.
7.   Iron the the Steam-a-Seam to the back of the paper and fabric scrap.
8.   Swipe the surface of the fabric scrap with the ink or stain.  If using the stain, after applying, wipe the surface with a paper towel to remove access stain.
9.   Die-cut a diamond shape from the paper, the fabric and metal scraps.
10.  Align the three layers and iron to adhere them together.
11.  Apply Crackle Accent to the paper side of the diamond and allow to dry and crack.
12   Glue the petal/chandelier piece onto the diamond shape using Quick Grip
13.  With paper awl, drill two holes (slowly) into the lower sides of the diamond to hang star & feather charms.
14.  Attach charms with jump rings and jewelry pliers.
15.  Place a jump ring into the ring on the chandelier piece.
16.  Thread four lengths of the thin jute through the jump ring.
17.  String on desired style and amount of beads.

***I chose to use a variety of metal tones and the turquoise color, jute and beads to give the piece a "dream catcher" look.

THE CONTEST
There is a Facebook contest running along with this hop. The contest will run from May 12th through midnight, May 21st.  The Grand Prize is valued up to $120.00 and contains:
1-ImpressArt Alphabet Set (Winner's Choice)
1 ImpressArt Steel Stamping Block, small
1-ImpressArt Metal Stamping Hammer
1-ImpressArt Stamp Straight Tape roll
An Assortment of Metal Discs
To enter the contest, go to this link and follow directions to enter:
https://www.facebook.com/pages/ImpressArt/155664424487844?sk=app 194975693850063


Now hop on through the other blogs for more inspiration, using the blue "Designer Craft Connection" button at the top right or begin at Theresa Cifali page linked here.

Three other ideas that I made using the ImpressArt blanks and stamps and various other materials:
"Sunny Smile"-hammered edges with stamping

"Mom's Love"-blank with stamped layer

"Feel Tagged"-different metal surface/inked

Monday, May 7, 2012

Designer Craft Connection - May Edition & More

Here we are the first Monday of the month, when DCC has another round of ideas to hop around to.  This month I will not be participating, but I will be promoting those that are, plus some other news.

This month's theme was "Quick & Easy Jewelry ideas".  You can start at this link - and then hop through the bolts of those participating for some inspiration.  Or click on the same logo that is located in the right sidebar of my blog to begin the hop.
Later this week I will be a part of a "challenge"using products by Impress Art.  These products are something new to me and I was excited to take part in this and try something slightly unfamiliar to me. There is a "GIVE AWAY" for this hop and this photo shows what the winner will receive.
This challenge takes place May 12th.  There are at least 20 designers who will be involved.  I myself can't wait to see what everyone comes up with.  I've been working on a few ideas and hope that it will help those reading the blogs to try something new.  More information on Saturday, May 12th, the date of this hop and challenge.

Though I'm not part of this months hop on Friday, our little quilting group went on our own hop of some of the quilt shops not too far from where we live.  There were eight shops involved, though we only visited two, plus a wonderful yarn shop and had a delightful lunch in historic downtown of Crystal Lake.
Williams Street, Crystal Lake
The first was "Quilt in Joy",  located in Huntley, Illinois.  It was packed with an amazing array of fabrics and ideas.
Vintage display
Waiting to check out
Then it was on to Crystal Lake, for lunch at Benedict's ( the second of only two very good unique eateries).  The second quilt shop was "Material Girl", located in a truly vintage storefront that shows it's old-fashioned charm.  The last stop was to "Sunflower Samplings" which sells unique gifts, but has an gorgeous selection of yarns that only a speciality shop like theirs sells.  I did purchase a ball of yarn to make myself a quick, airy light weight scarf for the summer.

We were on the hunt for fabric for an upcoming project that we will be sewing in June at our monthly get together.  Here are the fabric combinations I bought to make samples of the "sew easy table runner" that I will be instructing the group to make.  Will share what becomes of these here in June.

I'm a little late getting this post up since I was away for part of the week-end but have already had the chance to check out a few of the "quick & easy jewelry" ideas that other designers have posted on their blogs and WOW ... fun ideas!  So start hopping through and more coming soon!