Saturday, October 21, 2023

Halloween Treats Without The Calories

Had some fun with creating a few new handmade (non-caloric type) treats for Halloween again this year. With the projects completed I figured it was time to do some sharing, so I went back and found some previous makes and decided to make a post of all Halloween related ideas!

NOTE: For each of these projects Sizzix dies were used to create them. The majority of projects here use dies designed by Eileen Hull for Sizzix, but several other dies and products used are also from other designers, all for Sizzix. 

Here goes - 


Thursday, July 27, 2023

Something Special Coming - Get Ready For The Holidays


Introducing a new die collection designed just for scrapbook.com! You will find lots of ways to use these dies whether you like making cards, journals or home decor. Each die coordinates with the set but also stands alone, giving you good value!

The Card Caddy is a ScoreBoards die, specially designed to cut and score thick material like matboard, chipboard, leather, felt and fabric, creating a sturdy base for other coordinating dies in the collection. The Caddy assembles in minutes. Use the die to create a card box, container for food gifts, holiday packaging or stationery, art journal, planners and cards- all this from one die!
Each of the three coordinating Thinlits sets fit perfectly on the box- cover with paper or fabric and create a special box of cards for yourself, friends or family!
Everyday Tags & Labels includes 13 dies: labels, tags, snowflake, flowers, and stars- everything you need throughout the year to add to gifts, cards, tags and journals!
The Floral Silhouettes die has 12 elements: floral borders and swag, individual layering flowers and centers and delicate foliage. Make the flowers in layers, or cut from watercolor paper and paint each flower by hand! Flowers work on everything and these are the cutest shapes!
Thel Starlit Village & Card Panel die set comes with ten dies: two rows of small houses, individual houses, moon, star cluster and Warm Wishes sentiment. These dies make a gorgeous Christmas village- or paint a pastel row to make beach cottages- it’s all up to you!
These dies are only available at scrapbook.com so buy while they still have some!
Schedule for featured dies: 
Week 1 Card Caddy 
Week 2 Starlit Village & Card Panel 
Week 3 Floral Silhouettes
Week 4 Everyday Tags & Labels


Following the Christmas in July theme for the release of this collection, I created a holder as an organizer for a variety of items. 


A  fabric covered caddy box was first made.  Next came an insert to separate the items it would hold, using the card caddy panel shaped thinlit and the bookbinding die to fit the inside of the card caddy box.

With the finished container and dividers complete the fun began.  Some mini slimline cards were created using some of the new die sets.  Using the Everyday Tags & Label set, tags for packages were made. Some holiday recipes can be kept on file with little house tabs attached to help remove them when baking begins. Shown are a simple white cards and a version made with decorative papers. (Use a decorative paper with a white side to either write of attach a print recipe copy.)


The Starlit Village die, cut from white card stock and pieced together make simple candle rings for a holiday table setting or other places to decorate. 


The final projects are a few ways the Everyday Tags & Labels can create some small banners to use a variety of ways for the holidays.  Hang them on the Christmas tree, in a window, on a mirror, on a door, from a shelf, use as a package decoration ... what all ways can YOU find?


Come create with these new dies "ONLY AT SCRAPBOOK.COM!

Tuesday, April 25, 2023

New Ideas To Share With Chapter 2 Dies

With the release of the new chapter 2 dies by Eileen Hull Designs from Sizzix just a couple of weeks ago, I have continued to have fun with finding more ways to use them. 


On the day of the release I shared with the "live" audience two projects that I created for the purpose of sharing that day.  All other projects were sent off to Eileen before the release to share  at the Name/Creativation show in Columbus, Ohio that she was attending. 

I'll share the two projects here but will be including the instructions for making the little banner, Three Pocket Posey Holder. The pockets are so easy to make! It's what you put inside that may take up your time if you decide to all "handmade"! You can also go the easy way and use purchased flowers and greens.

When I work on new projects my first thought usually is what material will I use!  When it comes to making any banners I like to use varied materials. Many times I will include both paper and fabric. For the project here I'll show both a paper version and a fabric/paper version.

Materials

Fabric/Paper (for pockets)

Sculpting Foam, Paper, Felt (for flowers and greenery)

Envelope, Journaling Card & Window Die

Various Sizes dies for flowers and greenery

Glue

TIny stapler

Cording or ribbon for stringing banners

Fusible (such as Pellon Steam a Seam or Thermo Web Heat n Bond)

Iron

Pressing board

Purchased greenery (optional)


***The process for using either paper or fabric for the envelope pockets, to create a banner are the same in the construction, as are the making of the flowers and greenery. When using fabric I will use either Heat n Bond Lite by Thermoweb or Steam a Seam by Pellon. Both are a fusible and sewable. NOTE: ALWAYS check if a fusible can be machine sewn, otherwise you can gum up the sewing machine if sewing is included!

The fusing process:

  • Cut fabric, paper and fusible the same size. (Approimately 6"  9")
  • Cut enough of the 3 layers for each envelope pocket that you want for the banner.
  • Set iron at the temperature suggested in the instructions for the fusible used


  • Remove the backing paper from one side of the Steam a Seam fusible OR lay the fusible side of the Heat n Bond down on the wrong side of the fabric.  Press the fusible onto the fabric piece. (following product recommendations). 
  • Allow to cool before proceeding.
  • Remove the backing paper, align the fabric fused piece to the paper (or another piece of fabric, if desired). 
  • Press the layers together to fuse.
  • Die cut the envelope from each fused, layered piece.
Three Fused Layers (fabric. fusible, paper)
  • Create the envelopes by folding the top flap down to the inside. 
  • Run a bead of glue along the "V' shape of the flap. Press in place. NOTE: Don't add glue to the whole flap. Leave an opening to thread cord or ribbon through the envelope tops for stringing the together. 
  • Glue the small flaps on each side of the bottom in.
  • WIth a small stapler, staple at each tp, side of the lower flap. NOTE: Refer to photo. A small paper brad could also be used or a small amount of glue. 


Finishing:
  • Cut flower and greenery with deisred dies, from papers or other materials.
  • Arrange the die cut pieces into the banner envelope pockets and glue them into place. NOTE: I crinkled up a small piece of tissue paper and placed it into the lower pocket for added dimension before placing the greenery and flowers
  • Add something of your choice to string the pockets together. 

Two Versions of the Banner

Pocket Envelope Banner Made with Fabric

Pocket Envelope Banner Made with Kraft Card Stock


Pocket Accordian Book


Sunday, April 2, 2023

Spring Has Sprung, Plus A New Dies & New Ideas

Chapter 2, 2023 Eileen Hull/Sizzix collection has sprung!

The new set will work with so many of the other dies designed by Eileen.  

There are three dies in the set: the Card Case, Mini-Slimline & Tickets and Journaling Card, Envelope & Windows. NOTE: Buy all three dies and get FREE SHIPPING on your order in the US PLUS save an additional $10! Cost to buy dies individually is $122- buy the bundle and pay only $112. Outside US, I will deduct $10 from shipping.

The Card Case is a Bigz XL ScoreBoards die. This die is specially designed to cut and score thick material up to 1/16" like matboard, chipboard, leather, felt and fabric so your finished project is nice and sturdy. The finished Card Case die measures 4 1/2" x 3 1/2" and has an adjustable spine that goes from 1/2" to 2 1/2". This is the perfect size journal to hold your 3" x 4" journaling cards, as well as other small items like wallet photos, ATCs and ephemera. There is a swing out flap on each side where you can add pockets or small insert books- you decide what combination you want to do. Make the spine thick or thin- your choice!

Here are a few photos of how I used Eileen's new dies:

The projects below ae made from various materials that I enjoy incorporating in most projects I make with Eileen's dies. Though paper is a wonderful material to use, I guess the challenge of what other materials can do is something I enjoy! These projects use other dies for embellishments and other purposes from collections of Eileens's and others from Sizzix. They co-ordinate well and show the versatility of Sizzix dies.

Muslin covered and stenciled card case


Inside fabric card case

ATC cards and pockets


Card case made from acrylic package and rice paper

ATC cards and pockets


The Journaling Card, Envelope & Windows die has 6 pieces- an envelope, 3" x 4" Journaling Card, three window cutouts (use with envelope to remove and back with glassine like a window envelope) and a tab. The Envelope measures 4 1/2" x 3 1/2" and fits perfectly inside the Journal! Or use it by itself and add your favorite ephemera pieces.

Double Envelope Holder

Envelope Holder with Journaling Cards


Envelope Book

Journaling Cards for Envelope Book


The Mini-Slimline & Tickets die design is similar to the Snail Mail die, which was very popular for creating faux postage stamps. There are four dies in the set- one is the size of a mini slimline card and one is a mat that may be placed behind the perforated piece. The other two pieces are a row of tickers and mat that goes behind that. When you fold over each perforated piece and tear it, it creates individual faux postage stamps and tickets! Die cut the piece from patterned paper for an amazing background- just add a sentiment and let the paper do the work.

Birthday card set

Birthday card / Set of four


Thank you cards

Thank-you cards / Set of four


MORE INFORMATION 

****There's a giveaway too! Comment in the Facebook and YouTube streams and tell us which of Eileen's other dies would work well with this collection. You have until April 10 to post your comments.

****Watch my YouTube channel to see die assembly and project ideas! Eileen does two livestreams each week on Facebook and YouTube-sharing more ideas on how to to use these dies in lots of different ways. 

****You are invited to join the creative community Facebook group, the Eileen Hull Fan Club, where you'll find special events and exclusive content. Follow Eileen on Instagram at @eileenhull!

There are lots of samples so, make sure to read the blog and be watching social media to see all the makes! LIST OF HOP STOPS:

Eileen Hull Designs << you are here
Pam Bray
Jennie Atkinson
Sarah Lizzie
Lisa Hoel
Susie Bentz
Tonya Trantham
Jenny Marples
Maggi Harding
Karen Bearse
Sue Eldred
Sharon Curtis
Teresita Arvelo
Madeline Arendt
Cheryl Bodkin-Waters


Tuesday, March 28, 2023

Wordsoup, Tags & Pockets

This month one the Eileen Hull Blog the subject has been "Wordsoup, Tags & Pockets".  With the release of the Chapter 1 collection from Sizzix this topic lends itself well.

Included in this collection is the:     Frame Pocket Journal

                                                             Library Pocket & ATC Card Die

                                                       Alphnumeric Die

                                                       Tablecloth 3D Embossing Folder


Anyone journaling knows the first aspect of this process, of course is using words to express yourself.  

The other components from the collection also add the ways to express with "words". 

Projects that I made using this Chapter 1 collection designed by Eileen, can for the most part, fit this subject.  Here are some images of how "words, tags and pockets" speak out!

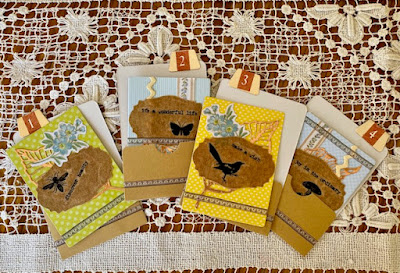
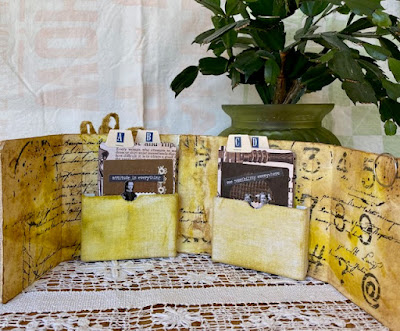
The first project with the Chapter 1 Frame Pocket Journal contains two pockets on the inside that hold to accordian style booklets made with the Library Pocket thinlit die that holds ATC cards made to be tags.  On the back of the book and extra pocket is made using the flap to hold more tags.  


For another project the Frame Pocket Journal makes a smaller book, by cutting one cover and cutting it in half.  A few Library Pockets were made that hold some tiny tags and inserts to the inside. 


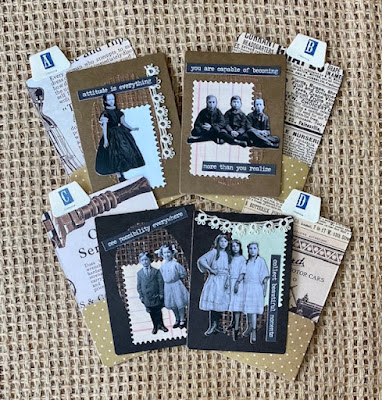
***Make simple tags using any dies available cut from neutral colors or patterned papers and add words or quotes either hand printed or in any other form to the tags. Use the letters from the Alphanumeric thinlit die to spell out words too! 
A PROJECT IN THE WORKS

After creating these projects I was inspired to try making another. It is not completed as yet, and I apologize for that, but thought I would at least share the process of my plan.

The plan is to create several Library Pockets using various papers and maybe some other types of materials.  Then  create ATC cards for each, that will hold a card with a word or quote for the pockets.  They will contained in a box that can be made with either the Gift Box die or the bottom portion of the Treasure Box die.  The collection would be a box of inspirational, meaningful words and quotes. 

So I got to collectiong materials for the box, the pockets and cards.


The container was made from the Treasure Box die. I added fabric to one side of the mat boards (this will be the fronts), and a neutral paper to the opposite side (this will be the inside), before die-cutting the the pieces.  

After cutting, the box is assembled. The edges of the box were painted carefully with white paint.  All the edges of the box and the fabric were lightly distressed with Vintage Photo Distress Ink. 


Using the LIbrary Pocket and ATC Card thinlit die, I cut 24 sets from a variety of decorative papers for the pockets and used manila folders for the insert cards.  NOTE: The Treasure Box can likely hold up to 36 or more pockets and cards.

I used scraps from the leftover papers to add some embellishments to the cards. 

Once all the cards are complete with some background decorations, more layering can happen. I'm planning on using torn bits from old dictionary pages with definitions or images that correlate to the words chosen for each ATC. 

Ideas: Add either handwritten, typed or ready-made verses or words to each card.  On the back side of each card add meanings or thoughts or other expressions for each verse or word used.

The box needs a few more decorative embellishments to finish its look. Once the entire project is complete i will be happy to share the finished piece.