Friday, April 3, 2020

Faux Tiles with Creative Art Textures

Create "faux tiles" with two colors of paint and papers, a gel plate and Creative Art Textures designs by Rebekah Meier.


Black Box & Black Book

The projects of this box and book were made to show how to print with the Creative Texture Plate and a gel printing plate. A single Creative Art Texture design and single colors was used for each project; Black on white, white on black.  A print was made for the 6 sides of the box and book covers, inside and out.  To give the printed pieces the look of glazed tiles, each print was embossed with clear embossing powder. 

The little black book is made from one die cut box design fits inside the finished gift box.  

NOTE: Beside the written instructions, there is a short video of approximately 4 minutes that covers the the printing on the gel plate, trimming the printed designs to fit the sides of the box, the process of embossing each design and adding the embossed squares to the box.  In the written instructions the Creative Art Textures will be referred to as CAT.

Material List
Acrylic paint - white, black
Brayer 
Printing paper
Mat board - 3 sheets
Adhesive (sheet or spray)
Clear acrylic ruler
Paper cutter or rotary cutter
Clear embossing pad
Clear embossing powder
Heat tool

Extra Materials 
Scissors
Ribbon bias tape
Piercing tool
Scoreboard and tool
Paper for book spine and pages

Extra Materials
Black paint
Brush
Glue
Extender/paint
Optional: Mod Podge, glossy finish

Instructions

Printing the tile designs (Make 6 for the Box, Make 4 for the book)


  1. Apply paint onto a surface (I used another gel plate). Use a brayer to spread the paint onto the gel plate used for printing with the Creative Art Texture.  
  2. Remove the CAT from the plate and apply the paper square and make the print.  Repeat for each paper square. Repeat the process with both black and white paint.
 NOTEThe short video shows a small part of this process, found at the end of the post


Measure - Trim Printed Design Tiles
  1. Using an acrylic ruler, find the center of the printed design image on each printed sheet, in both  directions and mark.
  2. Trim all four sides with a rotary cutter and ruler to fit the measurements of the sides of the box. 

NOTE: The short video shows a small part of this process, found at the end of the post.


Embossing the Paper Design Tiles
  1. Press the paper tile into clear embossing ink.
  2. Sprinkle with clear embossing powder
  3. With heat tool, melt the powder to coat the paper.
  4. Repeat these steps 2 to 3 times to build the coating to look like a glazed tile. Repeat these steps for each paper tile.
NOTE: If using Mod Podge, glossy finish, use several coats of glossy Mod Podge to get a similar look. Allow time between coats to dry well. 

Making Box
  1. Cut box from mat board (Two pieces will be needed for box, one for book).
  2. If using white mat board, paint the pieces with black matte paint. Crease at folds and paint the edges. Dry.
  3. Construct the box using glue or strong adhesive tape.
  4. Add double-sided adhesive sheets, cut to fit each paper tile square.
  5. Apply each square to a side of the box.
NOTE: Optional, a ribbon closure was made by using 4 lengths of ribbon. Poke a hole into the center of the bottom of the box. Thread the end of the 4 lengths through the hole, from the inside.  Knot the four lengths together (make the knot big enough so it will not pull through).  Draw up each piece of ribbon on each side the tie into a bow at the top.
Making Book
  1. Cut one mat board with die once.
  2. Measure and cut at the center of the middle square of the die-cut.
  3. Paint with black matte paint if needed. Paint all edges and creases. Dry.
  4. Glue the two cut pieces to form book. Use glue or strong adhesive tape. 
  5. Cut a piece of black paper for center of the inside book to hold pages. Measurement is approximately - 6 1/2” x 3 3/4” (No wider)
  6. Using a scoring board and bone folder, make lines for folds 1/2” apart along paper strip. Form an accordion folded inside binding for paper pages.  NOTE: Fold paper piece in half (this becomes the first mountain fold). Make 2 score lines from the center, both sides, each 1” apart. Turn piece over and make 1/2” score lines between the 1” spaces. The 2 ends will be a bit wider than 1/2”.
  7. Glue the first and last 1/2” fold onto the inner edges of the front and back covers. 
  8. Apply the finished paper tiles, same as the directions above for the box, to outside and inside of the covers.
  9. Cut paper pages of choice to fit the book, gluing onto the accordion folds of the inside binding.
NOTE: Optional, add ribbons for a closure, glued into,place before adding front and back tiles. 


Video Link:


Wednesday, October 2, 2019

Mixing It Up With Eileen Hull‘s NEW Pocket Notebook

Come join the party and see the creative ideas for Eileen's Pocket Notebook
Welcome to the Pocket Notebook Release Party! This is Eileen Hull’s newest book die with Sizzix. On the die, you get all of the pieces you need to make an entire book- the cover, pages, latch and pen loop! The Pocket Notebook measures 6 3/4” x 4 1/2” with a spine that can adjust from of 3/8” to almost 2”! String it with elastic, hemp, ribbon or twine. So many option for this fun die!

Eileen’s Inspiration and Educator teams have combined to show us their amazing Pocket Notebook ideas. Please follow the Blog Hop to see all of the fabulous projects, techniques and videos! 

There are also two GIVEAWAYS- the Pocket Notebook die and a gift certificate for Eileen’s Etsy store. To enter to win, leave a comment on each of the posts. Winners will be announced on Tuesday, October 8 on Eileen’s Facebook Live show.

Thanks for hopping along with us today!


Metal & Stencil Mix-Up

Having the opportunity to create with this newest Eileen Hull’s Sizzix die was fun! This is another one of those dies that keeps my mind busy with ideas.  This is a nice size for a book for any variety of uses.

My goal was to share ideas of using different materials and applications to incorporate with this die.  This caused me to take my favorite stencils, simple techniques of inking and the fun of working with metal embossing, then combining them all together.  Working with these Scoreboard dies and mat board makes for a wonderful surface for so many applications.

Before assembling

The marvelous products available for crafting today help with creating successful projects. When making books, journals or albums with mat board and dies, I like to use sheet adhesives like those from Thermoweb.  Using a product such as this allows the application of a wide variety of materials.  I love using papers but my favorite is fabric.  This project included some scraps of collected fabrics for the covers.

Preparing fabric for cover:

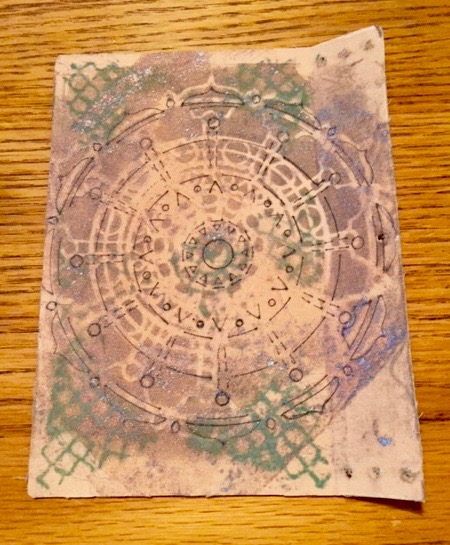
To design the fabric for book cover, place stencil onto the fabric.  Ink sponge and apply ink(s) over the stencil.  Don’t worry about complete coverage, randomly applications gives the fabric a faux batik look.  Move stencil around on the fabric repeating with the ink(s) until desired coverage.
NOTE: If wanting a different effect on the front cover, use the Art Sheet. Repeat the process used o for the fabric on the surface of the Mixed Media Art Sheet also.

Back outside cover

Back inside cover
For the inside front cover, a piece of the fabric was used.  It has the stencil design traced on it with a fine point permanent black pen first, then inked over the stencil pattern with a dark ink, before finishing with a stamped design .

Front inside cover
Apply all the designed fabic pieces and Art sheet to pieces of mat board and then cut covers pieces.

Assemble the pocket notebook as directions suggest with the adhesive of choice.  String the binding with elastic cord.

Signatures and Pages:

To make the pages for the notebook, I choose to use various packing papers I had saved.  I removed creases by ironing the sheets flat and stacking and cutting them to size.  

The signature folders were made using two different card stocks.  One has a solid yellow front with white back, the other a simple brown herringbone pattern on one side and white back.  I then used stencils and inks to add colors and designs on both sides of the papers and finished with stamped designs. The finished sheets are cut to fit the notebook and paper pages, then inserted.
NOTE:  A nice finish to the signatures and pages is to punch all four corners with a rounder punch before inserting. It also helps the process of placing and removing them from the notebook. 


Finishing Pocket Notebook:

Carefully punch four holes through the corners of the metal embossed pieces and front cover.  Put in place and hold with four paper brads.  If desired, place a few pieces of double faced tape to the backside of the metal before putting in place. A old rusty key was attached for a closure, along with a length of silk ribbon.

On the outside spine a piece of foiled adhesive was added. Hand dyed bias tape was laced through the elastic binging and tied together, then finished with some decorative beads. Any other added embellishments and be place on pages or signatures for added decoration.


Embossed Metal Cover:

Begin with a piece of aluminum metal slightly larger then then cover.  Place the metal onto a sheet of suede or foam pad the help with the embossing of the design.  Tape the stencil onto the center of the metal piece. Begin tracing with a stylus the pattern from the stencil.  There’s no need to trace every line. NOTE: If you do not have embossing tools, use a black ballpoint pen and and the round d end of paint brushed for forming indented circles.  For help with the process of metal embossing refer to either a book or videos online. Also, there are many videos online available with tutorials on every level of metal embossing. No need for expensive materials to start out with. Several books are available for purchase or possibly found at a local library. I was lucky enough to participate in a workshop with Magdalena Muldoon, the author of Metal Embossing Workshop. 

MATERIALS

Sizzix Big Shot machine
Eileen Hull #663638 Scoreboard XL Pocket Notebook
Mat board
Thermoweb adhesive sheets
Thermoweb Mixed Media Art sheets by Rebekah Meier
The Crafters Workshop, Rebekah Meier stencils,  Rosetta 461S
Lightweight, solid cotton fabric
Inks, assorted colors
Embossing metal
Metal embossing tools
Paper brads, 4
Elastic cord
Seam binding, white-dyeable
Dark brown acrylic paint
Cosmetic sponges

Extras:
Card stock, assorted plain or patterned
Distress Oxide pads or sprays,  coordinating colors
The Crafters Workshop stencils, Rebekah Meier 699S, 462S, 775S
Stamps, Impression Obsession, French document, NPC
Paper Trimmer
Metallic foils
Ribbon
Closure, old key
Beads
Any extra embellishments
Paper for signatures


Thursday, May 2, 2019

Spring Cheer


A little bit of Springtime cheer comes from some of my favorite tools and products

Easter baskets may be put away for another year, but this idea for a container can take on a variety of uses for anytime of the year. 

Materials Used
Sizzix die/EH Loaf Pan
Sizzix Big Shot
Assorted colored felt
Assorted colored card stock, green
Wire
Seed beads
Ribbon
Small punch or piercing tool
Jewelry pliers
Small foam block


***With this little project, I wanted to share ideas using my "go to" tools and materials that are always near by when I get the "creative bug"!

I have included here, very simple steps to make the entire project, but will only concentrate on the process I used to made the springtime basket from a very versatile Eileen Hull Sizzix die in my collection. This process goes a little beyond the step of just embossing the surface of the mat board with an embossing folder, which is totally acceptable.

An easy version would be to just die-cut, emboss and color the piece of matboard to make the basket. The use of both the Mixed Media Art Sheets, added to the Mixed Media Foam Sheet will give the finished look more texture in two ways because of the properties of each product.

Basket
Die-cut a loaf pan from the sheet of mat board. 
Color the inside of the die-cut mat board with color blends if desired.
Layer a sheet of art sheet onto the foam sheet. 
Die-cut a loaf pan from this layered art sheet/foam piece.
Cut the the die-cut, art sheet/foam piece apart, into nine pieces.
***( 2-long sides, 2-short, ends, 4-angled,ends, 1-bottom)
With 3D embossing folder, emboss each of the 9 pieces.
Use the color blends to color each of the embossed pieces.
Fold along the fold lines of the mat board piece.
Use glue or double side tape to form the loaf pan.
Remove the backing paper from each of the embossed pieces.
Carefully align up the embossed foam pieces over each side of the mat board loaf pan.
Blend all the  exposed edges with the brown color blend. 

Use ColorBlends to add some color to inside of basket 
The 4 main pieces embossed and cut into sections
Basket pieces colored and ready for application


Flowers
Die cut flowers from assorted felt. 
Die cut leaves from green cardstock.
Color wooden craft picks with green color blend.
Arrange the die cut felt flower pieces to form a variety of flowers. 
Glue the felt flower pieces together to create several flowers.
While gluing together the flowers, insert a green colored craft pick between the largest piece and the remaining layers.  Allow these flowers to dry before adding leaves to each with glue.
Squeeze a round glob of glue into the center of each flower. Cover the glue with seed beads. Leave to completely dry.


Finishing 
Poke two holes on each long side of the basket to insert wire handles, made with wire and the Twist and Style tool. Pinch ends of wire to hold in place with small pliers.
Glue a block of styrofoam to fit into the bottom of the loaf pan shape. When dry, insert the finished flowers into the foam.  Add crinkle grass of choice into the basket. Add any other decorations as desired. Tie a bow into the handles of the basket. 


Wednesday, March 20, 2019

Ideas with Eileen Hull Sizzix Dies - #2

Since my “go to” tools for most things I like to create are my Sizzix Big Shot die-cutting machine  and dies, I will be concentrating on old and new projects to share here and on other sites.

This will be happenig because of a recent opportunity that you can read about by going to the followig link. A new concept that you can read about here:Eileen Hull Educators

My relationship with Eileen Hull goes back many years as designers within the creative craft industry. During those years are paths went in different directions but always stayed connected in some form. We meet and know people along the way that we may always be delighted to promote and share what they do because  are own passion is helped by what they do.

Now, from time to time I will be posting projects here, and also share them on Instagram and Facebook pages and likely other sites. They will be a way of sharing ideas with all who like to create.  Whether a beginner, an expert or anywhere in between, my hope and goal is to share my ideas with others, and how I enjoy experimenting with products and combining different materials to be creative.

NOTE: The projects shared here will be using old and new dies designed exclusively by Eileen.  If other Sizzix dies are used they will also be listed after Eileen’s.


This is a pin made combining fabric and papers.  Easy to make for gift giving or as your own wearable to match any outfit or to embellish an accessory.

If there are any questions about this project, please feel free to comment and I will answer them.


Monday, November 26, 2018

Creating with Techniques From "Paper Art Collage" by Rebekah Meier


If you happen to enjoy learning techniques that can be applied to your work then I highly suggest that you purchase a copy of this ebook from Rebekah. All the techniques found within the book are very easy and adaptable with all styles of creativity.  The cost is well worth the ideas that you will get. It is a wonderful edition to any "creative souls" library!


Mixed Media Journal

I was delighted to be asked to participate with the other very talented designers, to create a project that used techniques from the ebook by Rebekah Meier's Paper Art Collage. For my project, I chose to create a journal and incorporate as many of the techniques found in the ebook.  


To make this journal I used a Sizzix die designed by Eileen Hull and the die cutting system that I like to use for most of my die-cutting.  I will also add the material list that I used to complete this project. I would like to add a "note" here for anyone who may not own some of the products mentioned here.
Please know that you can create a similar journal by cutting the mat board with a steel edge ruller and X-acto knife, as well as the mat board label on the front.  Embellishments do not have to be die-cuts.  There is an availability of pre-made embellishments at craft stores or online. 

***The purpose of this journal is to first show a variety of techinques anyone can learn to use to create any style of mixed media project, and also to show the versatility of the mixed media products that Rebekah has available for all creative souls. ***
Front Journal Cover
This cover was made using two different techniques from the book together for a layered look that still showed under the other embellishments.

Back Journal Cover
The back journal cover again uses a easy and fun background technique that will change with colors used, tools (such as stencils or stamps) and type of medium (paints and/or inks).

Front Journal Label

Another fun and interesting technique using foils that creates a lovely background, whether it is large or small.

Inside Journal Signature Covers

Transform double-sided card stock into something different using techniques found in the book along with a variety of stamps, stencils and various paints and other mediums.
Art Tape for Embellishments
Art Tape Foiling
Add coloring with inks or paints and then add stamped images to create "one of a kind" backgrounds for embellishments.  Add foil to the adhesive side for an intereesting affect.

Cover Embellishment Close Up


To complete the journal a burlap ribbon is added for texture, along with die-cut leaves from coordinating card stock.  The leaves have touches of various colored foils added to them before gluing in place.  A small bow was created from the Art Tape. The word "journal" is cut from foam.  The last element is an old jewelrey find.  Signature covers are made from the re-designed card stock, with inserts for each are  made by using copy paper.


Here is are links for information on materials used:

Rebekah Meier -
https://rebekahmeier.com
https://stencillove.com

Rebekah Meier ebook from Bella Crafts Publishing - 
https://bellacraftspublishing.com/paper-art-collage-with-rebekah-meier/

Rebekah Meier Mixed Media products from Thermoweb - https://www.thermowebonline.com/c/new-products_rebekah-meier-designs

Rebekah Meier stencils from TCW - 
http://store.thecraftersworkshop.com/product-tag/rebekah-meier/

Rebekah Meier foam stamps from Art Foamies -https://www.artfoamies.com/store/c9/Rebekah_Meier.html

Rebekah Meier stamps from Impression Obssession - 
http://www.iostamps.com/mm5/merchant.mvc?Screen=CTGY&Store_Code=IOSTAMPS&Category_Code=REBEKAH


PARTICIPANTS OF THIS BLOG

Rebekah Meier
https://rebekahmeier.com

Karenliz Henderson
http://www.karenlizhenderson.blogspot.com/

Deb Riddell
http://paxtonvalleyfolkart.blogspot.com/

Connie Shaw
https://connieshaw85.wixsite.com/website

Madeline Arendt
http://madelinesthoughts.blogspot.com/


List of Materials


ThermoWeb Products:
Mixed Media adhesive sheets
Mixed Media art paper sheets
Mixed Media art tape
Mixed Media foil sheets - patina, antique pearl, old gold
Mixed Media medium
Double sided tape, 1/4”


The Crafters Workshop:
TCW gold gesso, light & fluffy modeling paste
TCW stencils by RM 462, 462S, 768

Art Foamies:
Stamps RM mesh, mandala, Death Star explosion

Impression Obsession:
Stamps RM F22011,G22006, F22003, F22000, H22014, H22012, L22013, CC18

Paints - DecoArt media fluid acrylics, assorted colors
Distress oxide inks, assorted colors

Mat board, 2 -  6" x 13"

Sizzix Dies:
Eileen Hull journal die, thinlits 662813 
Sizzix nesting label die
Tim Holtz thinlits bows, skeleton leaves, funky festive

Gelli arts plate
Brayer
Decorative papers, assorted
Assorted papers, Various weights and colors Black foam

Seam binding, white Various embellishments