Showing posts with label #Eileen Hull dies. Show all posts

Monday, July 21, 2025

What To Do With Embossing Folders

Anyone who may follow me or know me, does know that my very favorite tools are those from Sizzix. The dies are my "go to" favorites, but I a fan of all the components they make.

This month Eileen Hull's Team have been sharing ieads with her designs of folders for Sizzix.  


Here is one that I created this week!  It consists of the Storage Box die for the box base and lid. 


The lid is given design and texture by using an embossing folder. The project is completed with some embellishments using a selection of thinlit dies from Eileen's collection.  

Materials Used

Eileen Hull Storage Box #666498

Eileen Hull Embossing Folder Textured Impressions A5, Floral Damask #666765

Eileen Hull Thinlits, Painterly Blooms & Background #666689 (Flowers, leaves)

Eileen Hull Thinlits, Envelope, Folder & Flowers # 666474 (Leaves)

Decorative file folder, white poster board

Metallic paper

Vellum

Thin metal sheet to create a band around the box lid

Felt, off white, green

Double sided adhesive tape, 1/4", 1/2"

Glue

Flower shaping tools and mat

Beads, for flower centers


  • DIe cut box, twice, to create the top and bottom of the box.
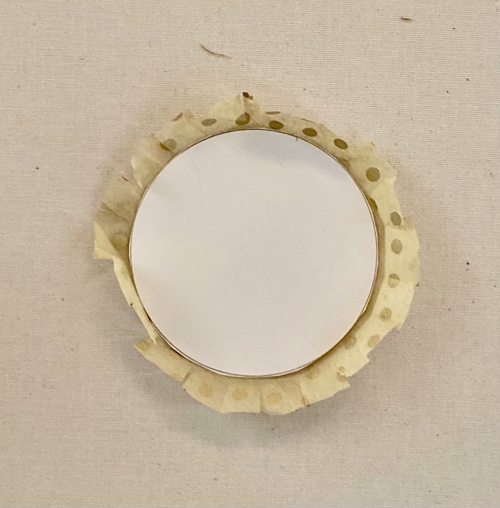
  • Emboss the metallic paper with the large embossing folder. 
  • Center the embossed design for the lid and mark where it will be cut. (Use the wrong side to make marks, before cutting to fit lid.) My paper did not completely fit, so an additional metal band was made to go around the bottom of the lid.
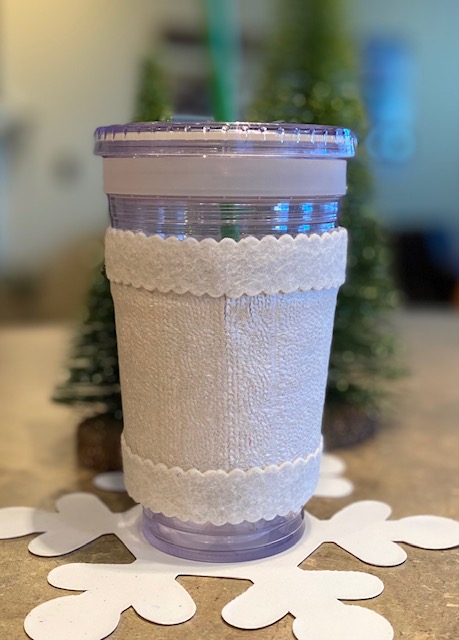
  • A strip of off white felt was cut with scallop scissors to make a little contrasting band. Glue near the top of one side of the lid or as desired. (Optional)
  • Green felt leaves are die-cut .
  • Thinlit flower dies are cut from the metallic paper, backed with vellum to make flowers of  various sizes.
  • Position the leaves and flowers in a desired arrangement. Glue all in place and allow to dry.
  • Add a flower center of choice if desired to compete the lid embellishments.

Wednesday, December 22, 2021

A Christmas Star Shines

To continue with the theme of "little and small" good things, and one more share of "Comfort & Joy" for Eileen Hull's Fan Club.


So on "Christmas Eve Eve" here's an idea for making a small star book before the holiday celebrations start!


Materials

  • Tiny book die
  • Glitter paper 
  • Decorative papers, assorted (3)
  • Ribbon, closure
  • Double sided tape, 1/8" or 1/4"
  • Various flat embellishments


  • From chosen papers, cut a cover.  ( I used a gold glitter corrugated card stock because it was sturdy but still flexible.) Insert pages are cut from decorative paper sheets. 
  • Cut the papers for the inserts with the tiny book die and the trim accordingly to create the folded pages. NOTE: I cut papers for 5 pages. This is a tiny book and thinner papers work best when layering them for the star effect. Cut papers one at a time, instead of stacking together, so the crease does not cut through. ***On mat board it would create a score line for folding that you don't need for this project.

Sizes for the papers for the folded inserts are:

Make 5 sets with 3 layers

3” x 4 7/8”

3” x 4 1/4”

2 3/4” x 3 3/4”


  • Use a scoring tool to crease down the center of the cover piece (The fold line will run down the center between the 2 original scoring lines.) 


There are many places to find instructions and ideas for making star books online. If more detailed instructions are needed refer to finding videos online on You Tube or other sources.

  • Each of the three cut papers for each of the five sections will go together the same way. The sides edges can be glued or use double sided 1/8" tape to connect them all. 


  • When all five sections are complete, connect each of the five sections with either tape or glue along the outer edges, before adding the layered five page section to the cover.  


  • Decorate the pages as desired with flat embellishments like small die-cut images or stamped words or verses. 


The book can be opened to form the shape of a star. The ribbon tie can be used to hold the book open as well as a closure.  A tiny clip can be added to help in holding the book open if so desired.  By using a flexible type of cardstock for the cover will make the opening of the book and folding the covers back easier.


Monday, November 22, 2021

Felt, Flannel, Fabric

That time of the year has arrived! The tools created by Sizzix designers are my “go to" tools on a regular basis, but during the holiday season they can lend themselves to loads of festive creativity. 

In this latest post I will share a few seasonal  ideas with some of the newest tools designed by Eileen Hull for Sizzix. There will be a couple holiday ideas from last season that will also be included.


Using the winter sweater 3D embossing folder to make a felt wrap for my reusable drink container. Two layers of felt are used. The top layer that is embossed, is first coated with a white layer of shimmery white paint. After the strip is dry it can be embossed with the 3D embossing sweater folder. Using a found template for the cup wrap, both felt layers are cut out and glued together (can also be sewn around the edges). Join the ends of the wrap and glue. Two strips of felt are cut for top and bottom borders. 


The circle from the ornament box die is used for the double sided, fabric/flannel ornaments for a banner or tree decor.  Two different fabrics can be fused together, or use one design for both sides. Die-cut the circle shapes. Embellish with the zig-zag design cut from fabric scraps or foiled papers. Cut the ornament top from a thick metallic paper.


The larger tree from the pickup truck die becomes three-dimensional ornaments.  Made with fused flannel, three die-cut tree shapes are folded in half and glued together. Add them to trees, garlands or gift packages. Here they are added to a simple fabric banner made from torn strips of cotton fabric and ribbon that are tied to cording. The little flannel trees could be decorated with tiny embellishments or some glitter or snowy paint. 


SOME LAST YEAR IDEAS

Bells made from the teacup die.  Make single bells or string them together for a garland of bells. Fold three or more and create dimensional bells.


An angel created from the spoon shape from the same teacup die.


A snowman banner from the snowman box die.


Mitten banner.


Sunday, July 25, 2021

Christmas In July Ornament Idea


With this latest release of die by Eileen Hull for Sizzix comes great shapes. For now the Ornament Box will be the one to work with for this project.

Materials

Big Shot

Eileen Hull Sizzix Ornament box die

Mat board

Decorative papers

Foil paper (Rinea papers) 

Double sided adhesive tape/sheet

Tissue paper/napkin

Foiling sheet, gold

Liquid adhesive for foiling

Gel medium

Brush

Ribbon 

Glue

Paper cutter

Gold cording

Artificial greens

TIPS

**** Just a few ideas tips of materials and the process used in creating a slightly different version with the Ornament Die***  

A decorative tissue paper was used to cover the circle die-cuts, but napkins or thin decorative papers or even fabric could also be used. Also if desired, cover the mat board with a material of choice on one side and add a foil paper or use the same type of material on both before continuing to cut them with the die.  Foil by Renea were used in this project. 

Refer to photos for cuts and sizes that were used to complete this project.  A small piece of styrofoam was cut to fit inside the inner box to hold the artificial greens in place, but that is optional. The same design could be used to hold small treats instead.  They can be hung on a Christmas tree or could be used at table settings for holiday entertaining.  The bottom of the circles could also be trimmed off to be even with the bottom of the box to stand flat for table settings. 

Paper covered inside box & front and back of covered circles


Constructing the Ornament Box

  • Die cut two circles from mat board
  • Die cut two circles from foil paper (red Rinea foil). It can be backed with double sided adhesive before die cutting or can be glued into place on the back side of the tissue covered circles.
  • Die cut one of the box component from mat board.
  • Refer to the photo that shows where to trim the four diagonal ends off the piece. 

  • Cut two side pieces from a piece of mat board that measures approximately 1 1/8” wide x 1 7/8” high.


  • Using glue or double sided adhesive tape, assemble the open box shape.
  • Cut decorative paper to cover the box shape. One piece is cut approximately 6 3/8” long x 2 3/4” (this will cover the larger sides of the box).  It a second piece of paper approximately 1” x 8 1/2”. (This will be attached to the narrow sides, bottom and over the top edges of the box piece.) 


  • Cut circles from decorative tissue or napkin for covering the mat board circles. Cut the pieces approximately 1/4” larger then the circle piece.


  • Apply the tissue to one side of the circles using gel medium and brush. Clip around the tissue so the extra tissue can bend around the edge to the back side; use the gel medium to adhere the extra tissue in place. Brush the front layer of tissue with another coat of gel medium and let dry before continuing.

  • Adhere the foil circle to the back side covering over the tissue edges; press in place well.
  •  When both circles are covered and the inner box shape is covered, created the 3 dimensional ornament by gluing the box between the circle shapes.
  • Coat the hanger shape die with foiling adhesive. Dry to tacky and rub on the gold foiling. Add another layer if needed also applying to edges and back sides. Glue into place at the top of each circle shape. 
  • Die cut 2 or more of the zigzag design from foil covered mat board
  • Apply the zigzag shaped, foil covered pieces onto the circles in any desired fashion. 
  • Insert a small spray of artificial greens into the box 
  • Add a length of cording through the hanger and knot.
  • Tie a length of ribbon into a bow and add on front near the top, near hanger.

Decorate away!