Monday, October 24, 2022

Double Geometric Cork Basket


The newest Chapter 4 release from Eileen Hull for Sizzix included the Geometric Box. We’ve been seeing and sharing wonderful ideas with the unique design. I chose to share, as a blog post this month, another version of a sample I created for the release. 


I wanted to share this idea with others. I didn’t want the box to be rigid as it would be but using mat board.  Still needed a base that would cut well and fold easily along the score lines. Using a heavyweight watercolor paper between two sheets of decorative card stock gave the box flexibility and the sturdiness I had hope for.  

When making this double basket I was able to include the use of of cork sheets by Sizzix as the top layer of the geometric boxes.

MATERIALS
  •  Big Shot machine
  •  Geometric Box die
  •  Watercolor paper, 140#
  •  Sizzix Cork roll
  •  Decorative card stock
  •  Double-sided adhesive sheets
  •  Mat board, small square 
  •  Glue
  •  Sizzix thinlit dies
  • Distress ink
  • Cosmetic sponge 
  • White gel pen (optional)
  • Cord, for handle (optional) 


THE PROCESS OF CONSTRUCTING THE BOXES

  • Choose a decor paper for outer layers.
  • Cover both sides of the watercolor paper with double sided adhesive. 

  • Cover 2 squares of mat board with cork and decorative paper and double sided adhesive.
  • Remove liner paper and layer cork to one side of watercolor paper.
  • Remove liner paper on other side and layer with the decorative paper.
  • Die-cut 4 box pieces of the layered papers NOTE: These will create 2 boxes.
  • Cut two box bottoms from cork covered mat board.
  • Fold all the box pieces on the score lines.
  • Remove a thin layer of the paper from the joining edges of each piece.
  • Glue two of the box pieces together to form the box.
  • Complete the second box. 
  • Glue the bottoms into the boxes.
  • Align the boxes next to each other. 
  • Matching the point of the triangle and the straight edge of the bottom together.
  • Apply glue to one of the boxes and press the other to it to attach them together. NOTE: Double sided tape could also be used to attach them together but align them carefully


EMBELLISH THE BOXES AS DESIRED
  • I chose to ink along the edges of the top and bottom of the pieces and also along the angled folds.  
  • I die-cut some shapes using thinlits from the cork sheet. 
  • Glue the cut designs onto 6 of the boxes triangles 
  • Lightly add some color onto the thinlit designs with a paint brush with your choice of coloring. NOTE: These shapes can be colored before adhering to box.


Optional - Use a white gel pen to create dashes around the triangles 
                 Thread jute cord through holes punched into the sides and knotted for a handle


Monday, September 26, 2022

Cards For The "Spooky" Season

Sharing some card making with the help of Eileen Hull's new Skinny Mini Card Box and other Sizzix tools.


Two card boxes are made using mat board covered on both side with coordinating, decorative card stock. Handmade cards and envelopes are made for each box. This new box is the perfect size for holding mini slim style cards.  Four seasonal cards, with envelopes are made for each box. NOTE: The box can likely hold 4 to 6 cards with envelopes. 

TIP: Make sets of cards for different seasons or occasions.  Add the handmade cards in a a lovely Skinny Mini box to match the occasion.  These would be a great idea for gift giving. 


MATERIALS

Skinny Mini Book Box die,

Mat board (2 pieces per box)

Snail Mail thinlit die

Decorative papers (2 designs per box)

Double-sided adhesive

Plain white card stock 

Contrasting, solid paper for middle layer

Various decorative papers for top layer

Stamps

Inks

Small, decorative dies for embellishments

Alphabet dies

White copy paper (for envelopes)

Paper trimmer

1/8” doubled sided tape

Scissors


Making Process 


Making Layered Mini Slim Cards

  • Cut card stock weight paper for base of cards, measuring 6 7/8” x 6 1/4”
  • Middle layer, measures 5 7/8” x 3 1/4”
  • Top layer, measures 5 5/8” x 3”

Paper sizes for layers


Layers

  • Cut all the papers for each card.
  • Use a scoreboard and bone folder for adding the center fold to each card. 
  • For layered papers, some ideas are to trim the edges of the layers with decorative scissors, tear the edges or machine stitch around the edges. 


Adding extra embellishment layers with various materials as:

  • Stickers
  • Paper cut-outs
  • Stamped images
  • Buttons
  • Ribbons


When creating card fronts on any size card, feel free to use a variety of materials for adding layers and interest.  Here are some ideas:


Monday, August 22, 2022

Extra Space Storage Caddy

One of the newest dies designed by Eileen Hull for the latest Chapter 3 collection is one called the Card Caddy.  It is a scoreboard die that, makes it possible to create substantial holders with many purposes.  Here is a version with extra storage to be used on a desk or craft table.


View inside storage caddy 


The very first project I created was a mail caddy. It’s constructed by making three caddies and connecting them together. The design of this die is open to many combinations for books, albums and various holders.  

The project for this post uses my original idea but taken to an expanded look. 


By connecting finished caddies together, you are able to configure some lovely decorative containers for many different storage needs.  Make them to fit you color scheme for a crafting area.  The side pieces that close the caddy sides, can be used to make dividers; add one or more or none.  A handle can easily be added for carrying if desired.  


Let the making begin...

  • It all starts with choosing papers for covering the mat board. 
  • Cover each side of the mat board with coordinated papers of choice with double sided adhesive. (NOTE: it is possible to cover the mat board with papers or using napkins and collage medium. This process may cause the mat board to warp but it can be straightened by pressing between parchment paper and heavy books.)


  • Cover 5 pieces of mat board for each of the 5 caddies. One extra piece of mat board may be needed for the side pieces for each caddy, or extra dividers if desired. 
  • Die-cut the caddy shape  and sides from covered mat boards.


  • Construct the caddy boxes, adding the two sides to each. (NOTE: Some of the paper layers on the tabs can be carefully removed, if desired.)


  • Complete the construction of FIVE caddies. (NOTE: three for the center section, two more that will be the end caddies on each side.)


The 3 center caddies. Add one more on each side. 

Finishing the storage caddy

  • (Refer to top view photo for caddy alignment and handles.)
  • Add twisted wire handles, if desired.


  • Add embellishments of choice, such as fibers, ribbon, trims, flowers, etc.
  • Add feet to the bottom corners, if desired. 

IDEAS:

Instead of covering the mat board with decorative papers on each side, try napkin collage, old magazine page collage, painted mat boards with stencil designs, texture paint on the outside facing side, gel print the boards, fabric cover the boards boards on one side. Cover one side of mat boards with vinyl contact sheets  to give a protective surface to the inner side of the caddy boxes.  

The width of one finished caddy is slightly wider then the width of three caddies glued together. When connecting them, as in the project shown, then extra width is not really noticeable because of the embellishments wrapped around the entire piece,  if desired, trim a scant 1/8” from each side of the die-cut piece before creating the caddy box.  


Materials Used

  • Mat board 
  • Coordinated Decorative papers
  • Double-sided adhesive sheets or roll 
  • Heavy duty glue (Beacon 3-in-1)
  • Extras for embellishments 
  • Ink
  • Wire


Monday, August 1, 2022

Chapter 3 Release Time - Let The Ideas Flow


It’s that time again!  Eileen has new Sizzix products out and let the creativity begin!  There are two scoreboard dies, one intricate thinlit die and a 3D embossing folder in this release.  Here are images of each new item!


Now to share ideas, that I had the so much fun creating with the new Chapter 3 collection. 


Starting with the card caddy die, here are four ways I used this die.

Card Caddy x 3


Card Caddy & More


Card Caddy Banners


The skinny mini book box die is another versatile die and here are three ways I used it.  

Skinny Mini Sewing Box


Skinny Mini Double Card Box


Skinny Mini With Shadow Box Frames


After making these seven initial projects as samples for Eileen’s new release, I continued with a few more ideas.  

Skinny Mini Thinlit Candle Surround


Card Caddy Holiday Idea Box

Skinny Mini Folder Holder


In the next few weeks I’ll share more details on a couple of these projects. NOTE: Most if not all of the projects created, I have used new and older design elements from various collections of  Eileen Hull's for Sizzix. Some projects also have various other components from all from Sizzix added for embellishments. 


Link to Eileen Hull’s Sizzix Hub: LINK

Link to Eileen Hull Designs blog: LINK


Monday, July 25, 2022

Time To Travel Is Anytime


Summertime usually means travel time, but it happens everyday throughout the year for different reasons. Here in this post I'm sharing an easy project to have on hand either for the car, a RV or to keep in a travel bag. 

In all the examples here, each book contains notebooks for keeping track of any variety of information and holders for receipts or various items needed while traveling or on the road, either near home or away. 

For all the examples here and others I have made in the past for a few of my traveling friends, I like to use images of maps. Either use found maps from resale shops, or pages from old road atlas's. I have also printed out copies of map images to use for covering books. 

Any of the  book dies, old or new, that are from Eileen Hull's collection by Sizzix make wonderful travel companions. 

The main purpose of the book featured, was to have something on hand in my car.  By using the Pocket Notebook (#663638), the size makes it easy for storing in the glove compartment of a car or for slipping it into a side door pocket for easy access.

There are several other dies that could by used in the same fashion, and listed here:

Passport Book (#660331)

Wrapped Journal (#662816)

Folio Journal (#664884)

Mini Album (#658982) 

Journal (#661906)


Insert for any of these can either be made or small notebooks or pads can be found at various outlets around or online. 

For purchased note book inserts, the outsides can be covered over with other coordinating papers of even fabrics. 

Folder envelopes can be fashioned as inserts also.  NOTE: I made a simple folder from two small envelopes. I covered the envelopes with clear contact paper to give them some strength and protection.  If the folder becomes tattered, make another and replace or add more.

Envelope folder view1

Envelope Folder view 2


Book Inserts


These two travel books were created for my granddaughters.  Each year, after the school is over, they have been lucky to go traveling with their parents for a week.  These were made for the summer they went on a two week trip, by car to several places West.  They contained pages for writing and pages for drawing, along with places to slip small finds and keepsakes of their travels.   

I made similar journals for friends who went on a trip overseas, using maps of the countries they were traveling to. 


Use this LINK to visit Eileen's Hub on the Sizzix website 

Tuesday, June 21, 2022

Leftover/Unused Die-cuts Become Something New


There are several unused die cut pieces that I keep handy in a container as well as an array of unfinished and unused embellishments. 

Since the majority of elements for the vintage truck and the camper (minus just a couple) were available in my stash, plus with the 4th of July only a few weeks away, I felt it called for some new summer holiday decor. 

The basic main, precut pieces were were painted either with red paint and blue paint.  All tires were painted black. The hub caps, the camper door and window were colored by rubbing them with silver Luster wax. The lower decorative strip on the camper is covered with metal tape.  

Once the truck and camper were constructed, a piece of styrofoam was cut to place into the open area of each piece.  Several star shapes were die cut from gold card stock. A toothpick was glued between two star shapes and they were used to fill the truck, along with several paper flags.  A large leftover rosette from an older project was glued to a popsicle stick and placed into the styrofoam inside the camper. The missing pieces were the hitch element, so I found a way to attach the ring element from the folio die to both the truck and camper.  A screw fits into the small end on the one on the back of the truck; while a small elastic band, attached to campper piece can be connected over the screw to hold the two larger pieces together.


Another photo view of the display, this time along with some of the other "leftover" and unfinished projects projects on the left side. Determined to get the one Pass Book and two wrapped journals finially completed this year to add to my red, white and blue decor items.  On 

On the right side is a near complete work in progress!  Inside the fabric covered book (Folio Journal Die) is another version of the shadow box frames.  Will share them all soon!

Happy Making to All!

Tuesday, April 26, 2022

Info & Tips for Creating with Shadowbox Frame Dies


Working with the newest release of dies by Eileen Hull for Sizzix has been a fun! Different from most of Eileen’s scoreboard dies, but still with loads of creative opportunities.

Thinlit dies vs. Steel rule


With this post I will share sample ideas and some learned tips since working with them, but not typical instructions and steps. As with anything new, be it ideas or tools, there is a "learning curve". That being said fit’s been enjoyable and a bit addictive working with the new dies. 

The important part to note is that they are constructed from heavy weight papers and not mat board.  I have been doing some experimenting with various types of papers to construct the frames and sure that more will continue.

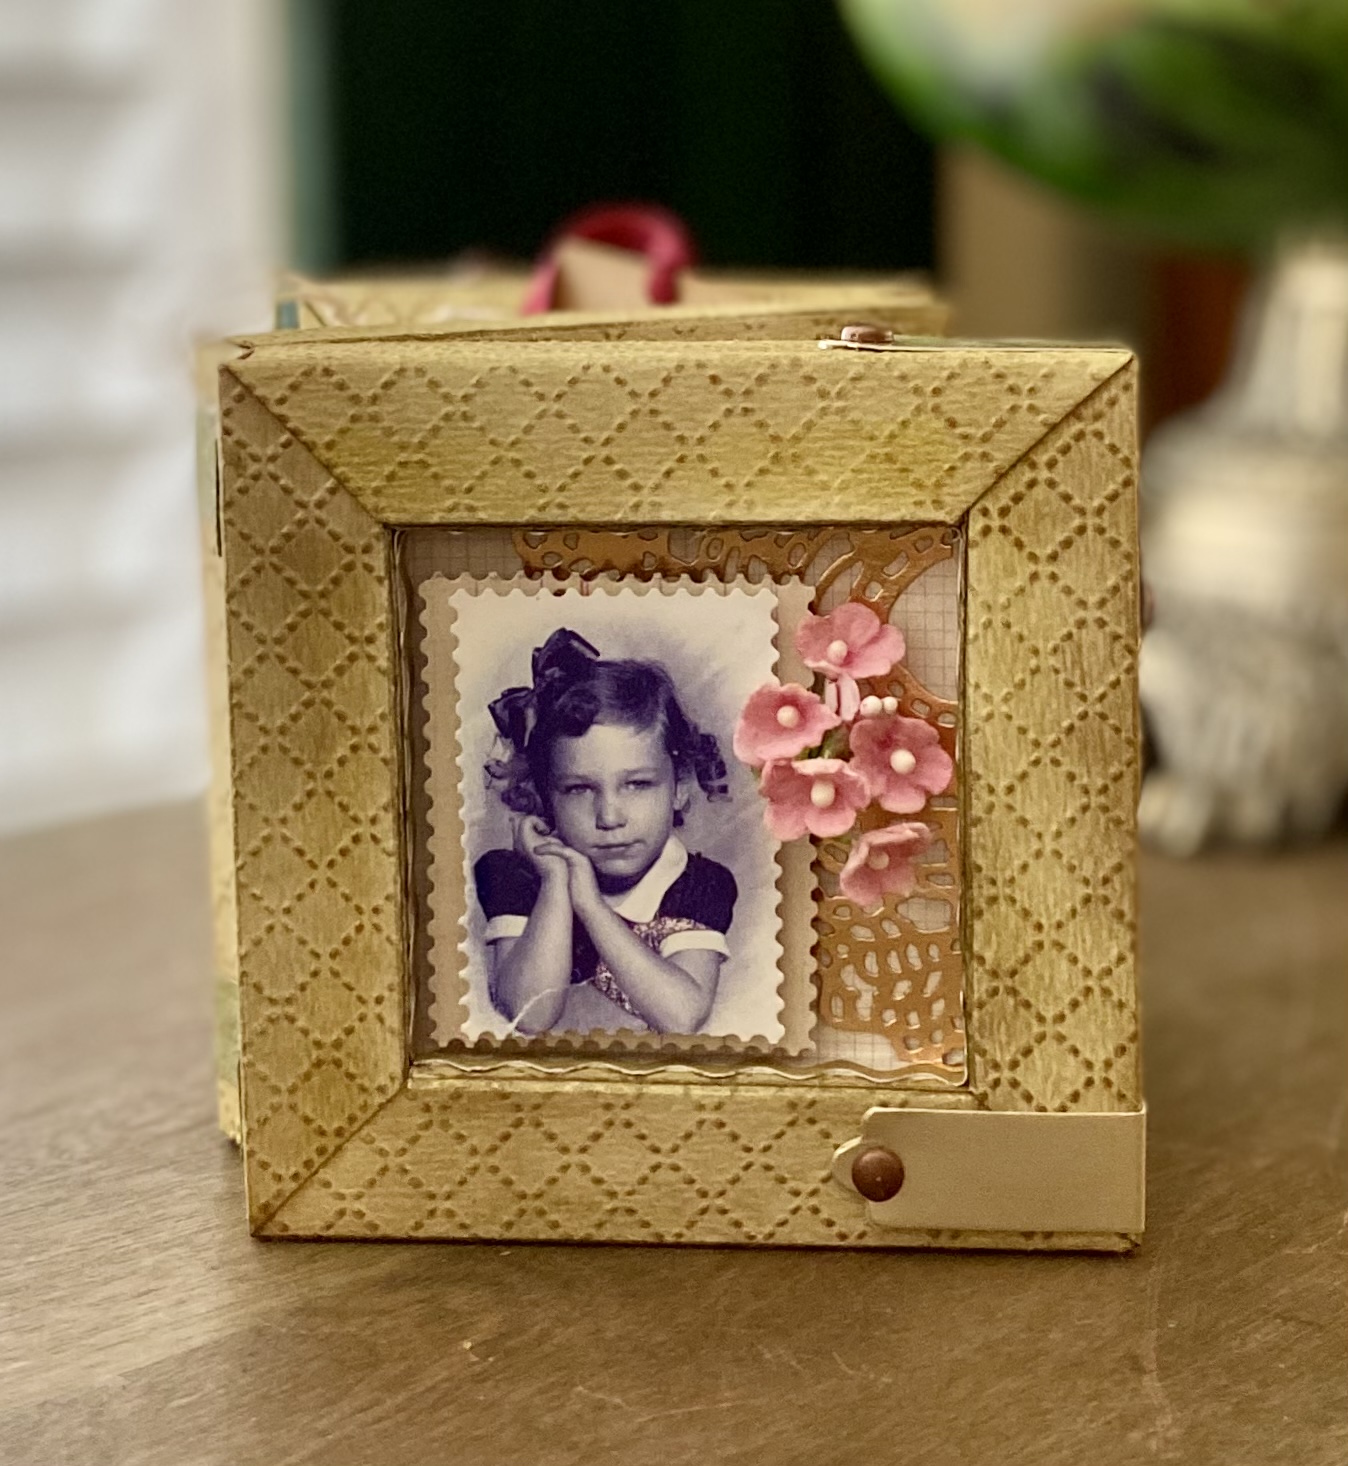
The first project that I created with the frames were three graduated sized squares to hold dimensional arrangements.  The ideas for dimensional designs or arrangements are endless. Stay simple by matting photos into the frames for displaying in groups, or get creative with dimensional creations.  The basic frames were made from watercolor paper and then collaged with old dictionary pages. This process came with some learning and tips to share. 

Collaged Shadow Box Trio 

The next project was to use them to assemble a hinged, fold out photo display. This can be kept simple too with just photos or add a bit of dimension into the frames. More ideas using similar construction are in the works now.  

Embossed Accordian Frames


Hinged Accordian Frame


Inked frame components

Embossed, inked, shaded components

Decorative dividers for inserts 


While working with these thinlit dies and assembling the frames, I have learned a few tips that I would like to share. NOTE: We may all interpret directions slightly different, and find our very own methods that may differ somewhat from actual directions. Find what works for you! Remember the learning never stops!


I feel one of the first thing really needed when constructing the frames, of any size, should be to understand the weights of different papers.  I’ve used different weights, from 90# to 140# for most of the frames. These weights are considered heavy weight papers.  A few papers that would be good to use are:

Sizzix papers (approximately 90#)

Bazzill papers (approximately 100#)

Distress watercolor card stock (118#)

Distress heavy stock (110#)

Watercolor papers by various companies (90# to 140#) found at craft or art supply stores  


Links to a site that help explain the weights of papers: 

Found on Scrapbook.com website - YOUR GUIDE TO PAPER WEIGHTS


For the frames I have created so far, I have used papers from 65# to 140#. 

I have also experimented with thin paper board like white poster board sheets from craft stores and gift boxes and cereal/cracker boxes. Materials like this would probably be considered as extra heavy weight. I likely wouldn’t use anything heavier then the cereal boxes.  Of course if using such materials they would have to be covered by either painting, inks, mixed media finishes or with collaged papers. NOTE:   Another tip that may be helpful - if using something extra heavy - after cutting the four pieces, it may help the folding by going over the score lines again using a scoreboard and scoring tool. I found this step useful. 

Gesso covered frame from packaging

Frames from heavier packaging materials 

Thin poster board, covered with decorative paper

Frame from file folder


When using a paper with a patterned design, I have found it necessary to be aware of the direction of the design before cutting the four pieces needed to make the frames. An all over design can be cut without a worry. There are designs were we immediately know the pattern direction and others that may not be as easy to notice.  Here are some examples and how to cut the four frame pieces: 

Assorted patterned cardstock

Cardstock with all-over pattern

Obvious directional pattern paper

Directional print pattern paper


Another experiment was with embossing the papers before constructing the frames. Here again some experimenting took place.  I found better results when using embossing folders that are not the 3D, thicker folders.  It seemed to me that they distorted the paper pieces making them difficult to fold properly.  The folding lines do disappear from the deep embossing; you can replace them with a score board and bone folder.  Give it a try and see what results you may have. I cut the four pieces needed for the frames before embossing. Also the coloring  (by ink or paint) was added before the embossing.  NOTE: Highlights can be added after embossing if desired. Use inks, dry brush paint or metallic rubs.

Embossed frame pieces vs. plain

Difference of embossing folders


Again remember that frames may be made from plain papers or file folders or gift boxes/cereal boxes can be painted or use texture paints alone or with stencils to add design or texture to the frames. Collage with bits of thin papers and gel medium.  Gesso was added to any packaging with printed designs before decorating with any method desired. 

Frames made from various 85# cardstock

***The next thing that I will be experimenting with is making different size frames by slightly changing the measurements of the frame pieces. That can be accomplished by trimming from the straight edge of the four cut frame pieces. ***


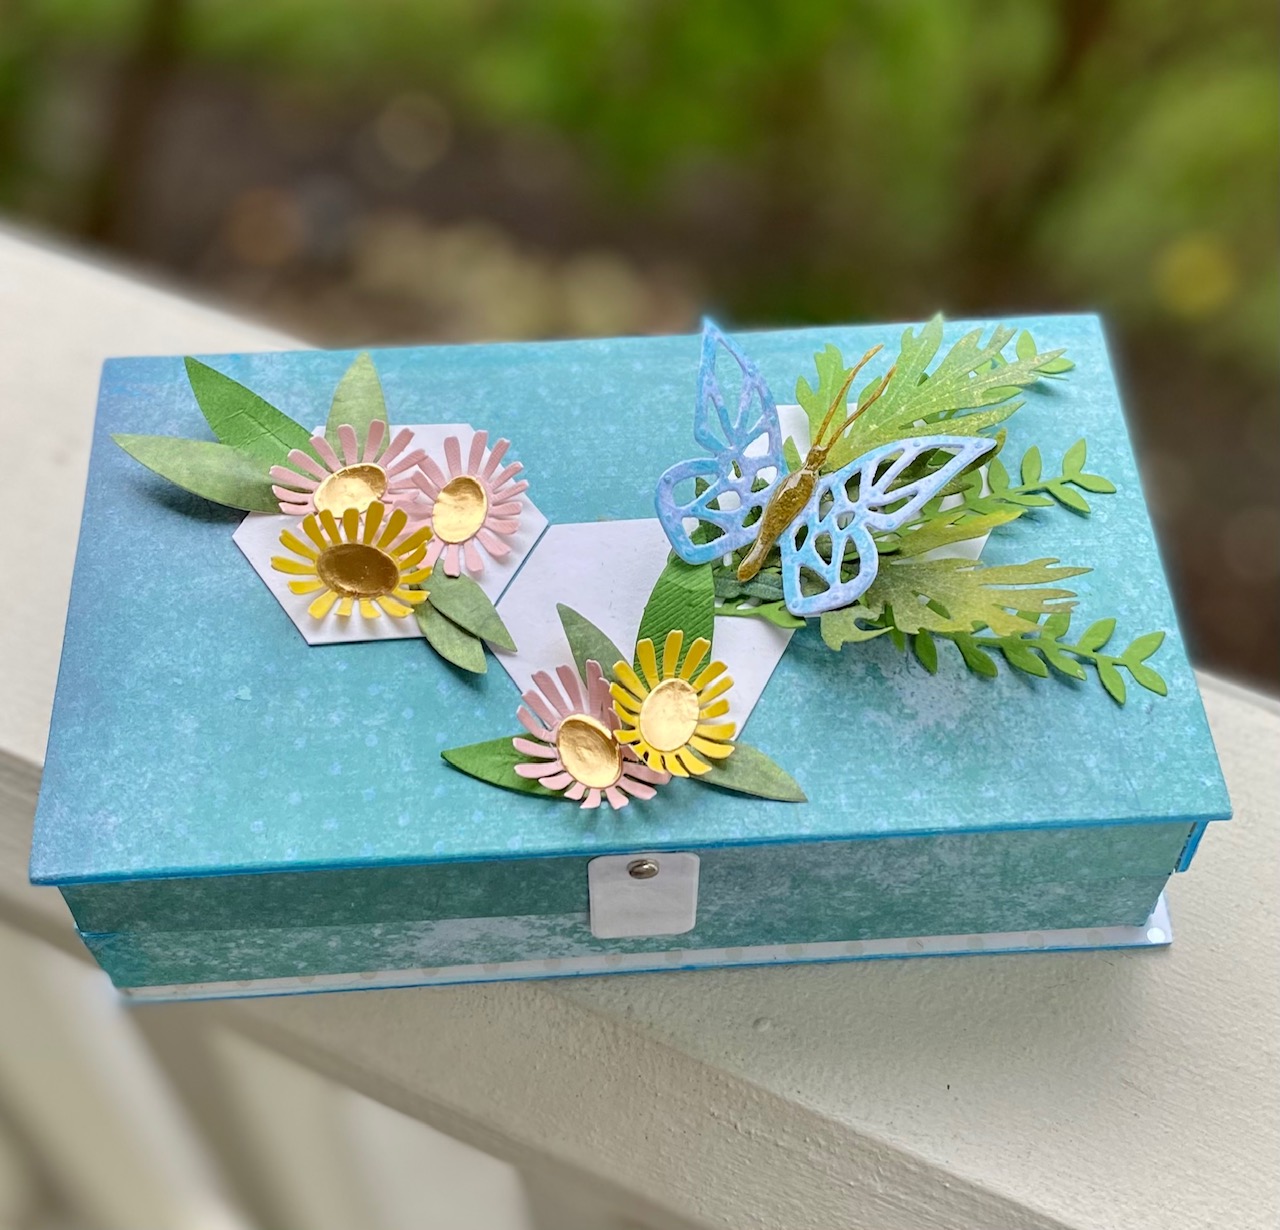
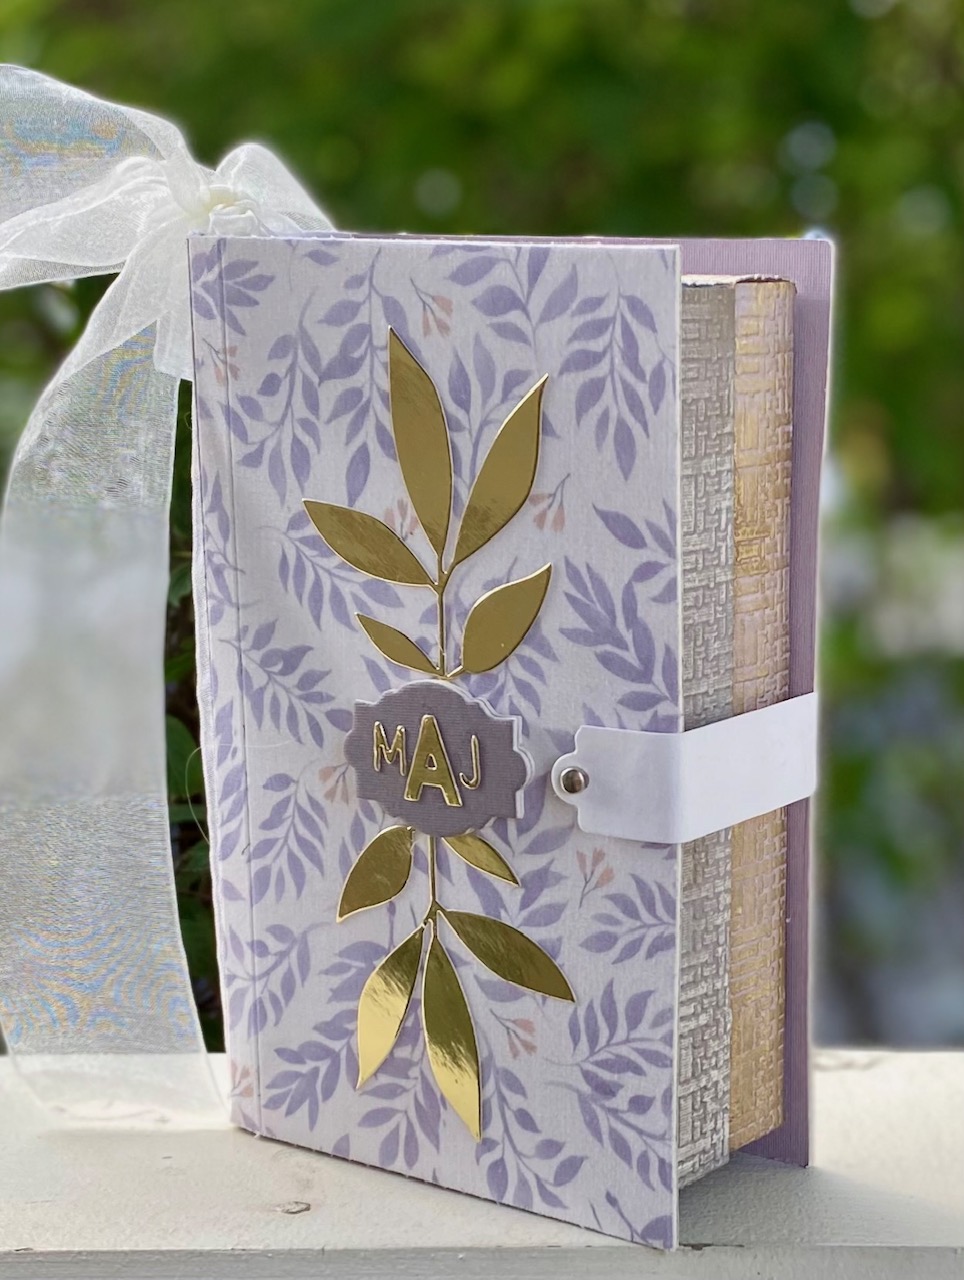
STILL TO COME ... Two ideas still in the works will combine the Book Box die with a frame and the other will use the Folio Journal with two frames.

Book Box die with Shadow box frame insert

Folio Journal with two shadow box frames inside