Friday, May 24, 2013

A Day In The "Windy" City

Oh the excitement and fun of visiting the city!  Being born and raised in Chicago, I have had several opportunities to experience the many features the city has to offer visitors and citizens throughout the years.  We have the "lake front", as it is known here, with miles to explore from up north to the south, with beaches, parks, boat harbors and many activities that will keep anyone busy.  The museums, aquarium, and planetarium  are always worth a trip for visitors or residents.  The "Magnificent Mile" not only with all the wonderful places shop, but the many things to observe like the people, the buildings and the history.  Of course this is only a little smidgin of this amazing area.  You only need to walk a block from one point and you find another interesting area to explore.  It's an amazing city and I'm so glad to have grown up here.

Yesterday found me at the Art Institute with my friend Rebekah Meier.  After the train ride into the city we hopped into a taxi to take us eight blocks east to Michigan Avenue.  IF, the weather would have been better we would have walked it, hustling and rushing along like everyone else walks in the Windy City.  The morning was drizzly, a bit chilly and yes, windy.  I wanted to hop on a city bus and let Rebekah experience her very first ride on one, but we missed it and didn't want to wait.


It's been several years since my last visit to the Art Institute, as well as Rebekah's.  There have been big changes or I should say additions to this attraction.  After speaking with one of the receptionist at the front desk, we decided to start our visit there having lunch at the "Terzo Piano" restaurant in the new modern wing of the building.  What an enjoyable time.  It's a good size, open room with windows all around to view the institute campus and some of the city's skyline.  Sleek lines everywhere within fit this modern addition to this famous facade.


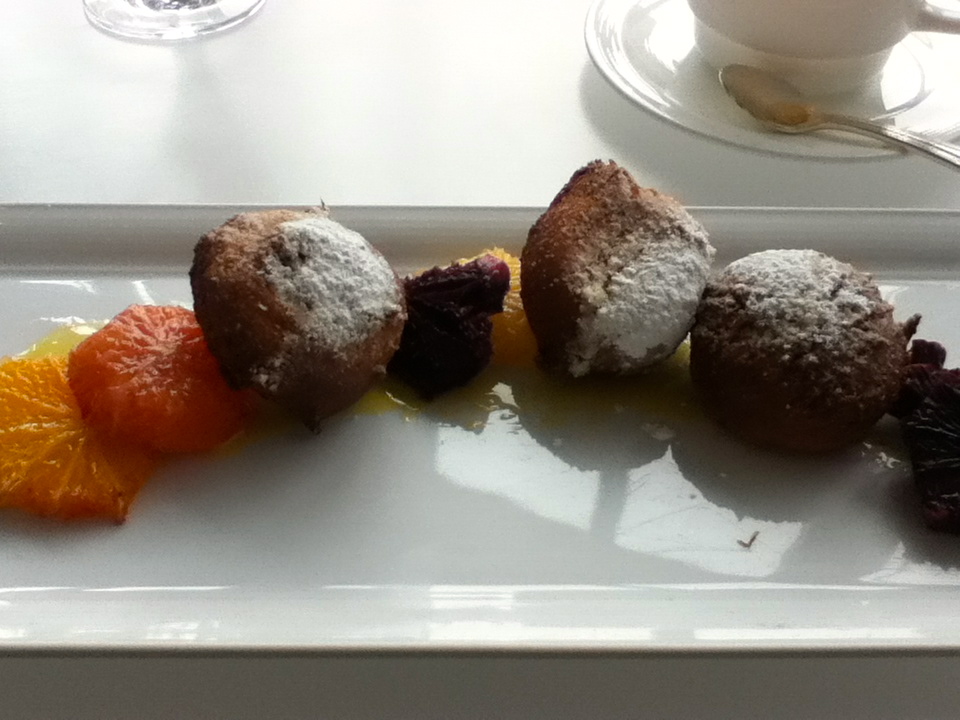
The lunch was excellent.  The menu is a modern Italian cuisine and chef, Tony Mantuano's philosophy is to use ingredients from local farms and farmers' markets and artisan producers who practice in a sustainable agriculture.  Reading through the choices we both chose to have a pasta dish that included handmade fettuccine that was so yellow from the eggs used. Mixed within the dish were tender, baby fiddlehead ferns, chiffonade of ramps, several cubes of pancetta in a very light, almost invisible sauce, then topped with a sunny side egg.  Delish!!!!  We glanced at the dessert menu and went for it.  Again, interesting and amazing choices.  Rebekah had what was called, Chocolate financier, with porter reduction, coffee ice cream and caramelized bananas.  My choice was Ricotta fritters with orange salad and chrysanthemum honey.  We didn't leave a speck on any of the dishes.

So after that we headed to the new modern wing with three levels to explore.  The Art Institute has been home to so many very famous art pieces.  Works by Picasso, Chagall, Monet, Renoir, Degas, Van Gogh, Matisse, Pollard, Woods, Toulouse-Letrac, Manet, Giacometti, Calder, Klee, Mondrian, Moore, Seurat, Dali, just to name a few.


You will find architectural pieces, folk art, furniture, early art from centuries ago.  Art is all around in every form and medium and it's worth a visit.  The new building now even holds the original trading room from the Chicago Stock Exchange.


To see and admire this vast collection of "art" was inspiring.  To see them and realize the time when they were created, and the passion and thoughts, each artist must have had to create and express themselves at that moment of time is thought provoking.  (At least for me.)

We took in most of the collections within the Art Institute and our legs were tired from the walking, but it was well worth it.  When in Chicago - make a visit.  Another wonderful aspect of visiting this place is it's location.  It's just next door to Millennium Park and the Pritzker Pavilion to enjoy.

So then it was time to flag down a taxi and head back to the train station for the trip back to the "burbs".
There's nothing like a taxi ride during "rush hour" in Chicago!

Next trip's plans are to the Peninsula Hotel for afternoon tea, overlooking the "Mag Mile" and somehow get that bus ride in the city!

Tuesday, May 7, 2013

Designer Craft Connection May - Wishes

Let's first say my biggest wish that I always have is to have "time".  I just can't figure out where the time each day goes and why I can't seem to organize my time better!

ANYWAY ... With the month of May bringing warmer weather (finally) and blooms everywhere, plus the special Sunday that we celebrate Mother's day, my project was to create something that would be appropriate for this time.

Here I created two different stick pins using Sizzix flowers dies.  The sunflower was made using one of the new thinlits™sets by Susan Tierney Cockburn.  The lavendar roses used the Sizzix Flowers, 3-D die and fabric paper.

The little green bud vase was recycled and repurposed from and old Clinique make-up bottle.  After washing it out and sanding the print off the bottle, it was painted in a mottled effect with a few layers of Tim Holtz Distress Paint and Ranger Adirondack Acrylic Paint.  The top of the bottle was covered with a small piece of woven ribbon.  Tie on a tiny Sizzlit Crescent tag with your wish.

The bud vase can be used to hold handmade flowers or any little bloom picked from your Spring garden.

So now I will send "WISHES" to all for sunshine, flowers and good things!

Saturday, May 4, 2013

Blog Hop with Unity Stamps by Ann Butler

It was a surprise and a pleasure to be asked to participate in this Blog Hop.  Ann Butler is a very talented designer who works within the creative arts industry.  I met Ann several years ago in Minneapolis, at a conference for creative designers, that we were both attending for the very first time.  We have remained in contact through the years.  The desire to create, that we both share, as helped to keep us in touch.  I have met so many lovely, creative people and it's always a delight to help promote them and their endeavors.

Unity Stamp Company just launched Ann's new stamps on Thursday, May 2nd. For this "hop" Ann sent stamps from her new line called "Faux Quilting".  As you move through this hop from one designer to another, you will see the wonderful ideas each came up with.  These type of hops are always fun to participate in, not only for the chance to use some new items, but to see the clever, beautiful ideas from everyone.

There is an offer from Unity Stamps to save 50% when ordering any stamps from Ann's line, from May 2 through Monday, May 6th, till midnight CST. When ordering, use the coupon code Unity 5.

So now onto my piece using Ann's Faux Quilting stamps!


What to do with these stamps was a difficult choice.  Since I do sew, quilt and do paper crafts, the choice was not easy.  In the end I decided to "quilt" a design from paper to cover a frame.  This same technique could be used to cover almost any object.   Watercolor paper was used for the quilting pieces.
I chose 6 colors from Ranger's Adirondack Acrylic Paint line (these are paints that have a slight metallic look).  Once the paper was dry, each of the six stamp designs were stamped onto the watercolor papers, using Ranger Archival Ink in Sepia.  Each of the stamped sheets were heated slightly with a heat tool to made sure the ink was dry.


The stamped designs were then cut into the 1" squares.  Each of the squares were than cut diagonally to  made two pieces for piecing the quilt patterns.  NOTE: Each of the sets I received did have a diagonal stamp for each design that could have been used.  I chose to just cut my squares.)

***The frame was purchased at a craft store.  Sand the frame.  Wipe away any sanding dust.  A base coat of was given to the entire frame with a creamy white color.  When dry, a coat of Martha Stewart white Pearl Paint was applied.

Once a desired pattern of pieces is achieved, glue the pieces into place on the frame.  Any clear drying clue can be used.  I used Glossy Accents by Ranger to hold the pieces in place.  Finish the frame with tiny white rick-rack and buttons.  Insert photo ... and enjoy!


Monday, April 8, 2013

Blog Hop for Slider Bracelets by Cousin Corporation


Just this past week while walking through a Macy's store near my home, I passed the jewelry department and spotted a large display of a variety of slider bracelets.  This opportunity to create my own slider bracelets with the new line from Cousin Corporation, was one I was happy to try.

The new line will be available at Jo-Ann stores.  Check out this how-to video on You Tube to see the ease of making your own.

In the supply package that I was sent, were a basic black and white leather bracelet band, along with two different sets of coordinating gold charm, spacers and hook clasps.  The bracelets would have been fine just put together with the pieces supplied, but I had to find ways to change each of them up just a little bit. It is always fun to is how materials can be manipulated to a different result.  With experimenting with other products and tools you can create truly unique and personal items.

For the black bracelet I decided to try to change the surface of the band in some way.  I went to tools on hand and used a metal "peace sign" stamp from Impress Art, to hammer a design onto the band.  I brushed some gold paint over the designs and wiped it off slightly.  Repeated the process to get the paint into the recessed areas of the design.  The slide charm and spacers were put onto the band as desired and then finish by gluing the clasp ends in place. The results were not bad but I would try some other techniques for better impressions.

For the white band and the flower charm another experiment was tried.  I used a Bic fine point permanent marker, in blue to add some color to the flower.  The flower was then brushed with a bit of Ranger Perfect Pearl Forever Blue powder.  A wavy line was lightly drawn across the length of the band with a pencil. Again, using a Bic fine point permanent marker, in green, go over the pencil line.  Tiny green leaves are drawn along the wavy line.  A hole was made to fit a jump ring for an extra added charm. The flower charm and spacers were than slid onto the band as desired and finish by gluing the clasp ends in place.  Again, the results for this were fine.  The charms and spacers are a great finish and metallic color, but I wanted to see how a different color could be added to change up the look.  The markers used worked well, better than another brand that I tried on the back side of the flower and the band.  Again here I would like to experiment a bit more with other mediums to alter the surface of both the metal pieces and the bands just for fun.

Enjoyed making the bracelets!  Easy to trim the bands for sizing.  I like the designs available in the charms and spacers and metal finishes. I would have enjoyed making one with my initials as an embellishment.  Definitely easy and fun to make for anyone!

There were other Cousin jewelry basics and "trinkettes" included in my package.  I decided to create other pieces with those included items.  Here are the three pieces:


Once all the materials were assembled, the above three projects were made in an evening.
NOTE: Some other Cousin products were purchased to be added to these and other materials on hand were also used.

Go to the Cousin Facebook page and "LIKE"


Monday, April 1, 2013

Designer Craft Connection April - Finds Around The House

Spring is slowly beginning here where I live.  There are little signs of green popping through the ground.  The mass of tiny yellow crocus' are opening under the crab apple tree out front.  A mason jar is filled with bright yellow daffodils on the counter.  So why not create a few more blooms out of different materials found around the house.


The flowers that I created are used to decorate a container for gift giving.  An empty corn meal container was decoupaged with cookie recipes torn from an old cook book.  The lid has a extra wooden knob attached to is for opening and trimmed with some natural jute cording.  A strip from a brown bag is used for a paper ribbon around the container.

Three flowers were made for embellishments.  The largest was a crochet loop daisy with a center made from a filter found in some of the K-cups that are used in coffee makers.  The plastic disc was covered by stitching with gold metallic thread and a gem stone addd to the center.  A small posy was die-cut from a "Peace Tea" aluminum can and then shaped and finished with a button center.  The third carnation like flower was made by painting die-cut, dryer fabric sheets and then gathering them up to form the flower.  Just glue them in place and add a little bow and fill the container with some delicious homemade cookies to give away of keep as a cute container in your kitchen.


Saturday, March 9, 2013

Buttons Galore & More Hop with Designer Craft Connection

Button, button who's got the buttons?  Buttons Galore & More, thats who!

What do you do with a bag of  buttons?  I was given five little bags of buttons and had some fun coming up with ideas to use them for more then just sewing on a shirt or blouse.

Today begins a blog hop coordinated with Buttons Galore & More, Viewtainer and the Designer Craft Connection, with what I am sure will be many, many crafty ideas with buttons.  Come and hop through the participating blogs and see what has been created and then take a chance to win a prize.


Go to this link:   Buttons Galore & More Blog          
Here you will find details of the list of blogs, the prizes and what to do to win.


Now on to a few things I came up with.  First bag contained some very cute little bee buttons. Flowers and bees seem to always be found together, so the little bees were used to add the perfect embellishment to some die-cut felt flowers on a headband and a hair clip.  Both pieces could be worn by any little girl during the coming Spring and Summer days, either as a daily accessory or for special occasions.  Any lady out there attending a summer wedding could wear this headband to an outside, casual wedding. The hair clip can easily be made without the clip and used as a lapel pin or a boutonnière for a wedding attendant.

Take some big black buttons and a length of ribbon and what do you make?  How about stringing them together with some black thin cord, adding a die-cut flower shape and a sparkly center and create a necklace.  Make two, slightly graduated sized loops from the ribbon piece, add one left-over flower-button at the center and attach it to a barrette for a matching hair adornment.

The third assortment contained a variety of coordinating white, off-white, yellow buttons.   Had to make a choice on how to use that many in the best way.  I went with the first idea of a decorative neckpiece.  Once again I went to my favorite tool, a Big Shot and dies, to cut a heart shaped base for the necklace.  Here I used two layers of white felt and one layer of Coats & Clark"s new "Phoomph™" in white. Some interesting edging was glued around the outside edge of the heart with Fabri-Tac glue. The whole collection of buttons, minus three, were arranged on the surface of the heart and then glue in place and allowed to dry well. (NOTE: Beacon Gem-Tac was used for this process.) Holes are made near the edge trim, on both sides, and braided organza ribbon is used for the band.  Form a small bow to add to one side for a little extra "pouf".  **Extra: the second idea was to sew these buttons on a decorative "cuff" made from felt or any desired fabric.

Next were four, large, brightly colored buttons.  Immediately I knew they would make the perfect colorful center to a flower.  Though the buttons are large, they are not overly bulky, so I used them to create easy note cards for "thank-you's" or personal notes or a cute, colorful place card embellishment for a DIY wedding or shower. All I added was a die-cut flower shape using a sweet, tiny printed paper and a small felt leaf.  Make them a little fancy by using a decorative edge punch along the lower edge.

The last collection was an assortment of two different sized buttons in a bright colors with a black, stitch design around the edge.  Here I decided to use them as the embellishment on a little black, velvet, wrist clutch I created. The clutch was made a layer of black velvet, black felt, with soft black "Phoomph" in between.  The sides of the clutch are sewn and some hand sewing completed the flap sides.  A magnet closure was added before adding the buttons to the top flap. Finally, a wrist band was formed from a strip of black felt, using Fabri-Tac and the ends sewn to the inside top of the clutch.

So there you have it, just few ideas for those buttons most of us love!  Hope you enjoyed my post and ideas.  Take some time after hopping through all the posts the Buttons Galore & More website and their blog.  Like them on Facebook.  Take some time to check out the Pinterest Boards.

Don't forget to go back to the blog and leave a comment for a chance to win the prize.  The winner will be announced on March 17th.

EXTRAS: Viewtainer Blog Link
                Viewtainer Facebook Page 


Monday, February 4, 2013

Designer Craft Connection Hop - February 2013 - Handmade with Love

A new month and a new DCC hop addition.  This month the theme is "Handmade with Love". Hopefully we can find any moment for making and sharing any type of handmade love.  With Valentine's Day only ten days away this certainly a very good time though.

Once again I went to my favorite tools to make something to share.  My Sizzix Big Shot and dies came to the rescue.  I combined my love of the heart shape with papers and felt to create a simple collection of wearable jewelry pieces.  Plus a little heart gift box for presenting any number of small gift ideas.


For the necklace, pin and bracelet I used the Flower Layers with Heart Petals (#658053) die from the "From the Heart 2013" collection by Eileen Hull. A printed paper of choice, with a coordinating felt, and  a "Steam a Seam" sheet to layer them before die-cutting into shapes. The layering of the paper with the felt makes the shapes malleable and sturdy.  Green felt was layered using "steam-a-seam" also, and then leaf shapes were die-cut with another die (Leaves #657119) from an earlier collection by Eileen Hull.


To make the heart shaped gift box, use Scoreboard XL, Heart Box (#658057).  Instead of using scoreboard, I layered two different fabrics and a heavy card stock with "steam-a-seam".  NOTE: This will not be as thick as scoreboard, but it can still be shaped into a sweet, simple box.  I die cut two extra heart shapes from card stock for gluing inside the box lid and bottom. NOTE: These hearts may need a slight trim to fit the inside.  Trim the top edge of the heart with a narrow trim or ribbon. Glue a very narrow trim or rick-rack around the bottom edge of the lower box.  Add a bow or desired decorative element to the top.

Fill the heart with sweet treats, either purchased or homemade, or any other small special gift to give a loved one.


Tuesday, January 8, 2013

Designer Craft Connection - January 2013 - Home Decor

Decorating fun with old windows
(The photo shows a way to reuse an old window for home decor purposes. I will add and share three versions of how old windows were used in our home soon.)

Revised on January 11th -  Reused old windows that are used as decor elements here at my house in three different locations.


Yes, it's that time once again.  It's not that I forgot to get a post up this month, but just didn't have anything to post.  Great subject for this month, but I have been busy with getting decorations down and the house back in "pre-holiday" style.  The goal is to reorganize and clean - upstairs and downstairs.

I am hoping to find something to post on the subject of "home decor" to share.

There are posts up from other designers that are worth a read to hop on through the blogs for some ideas.